


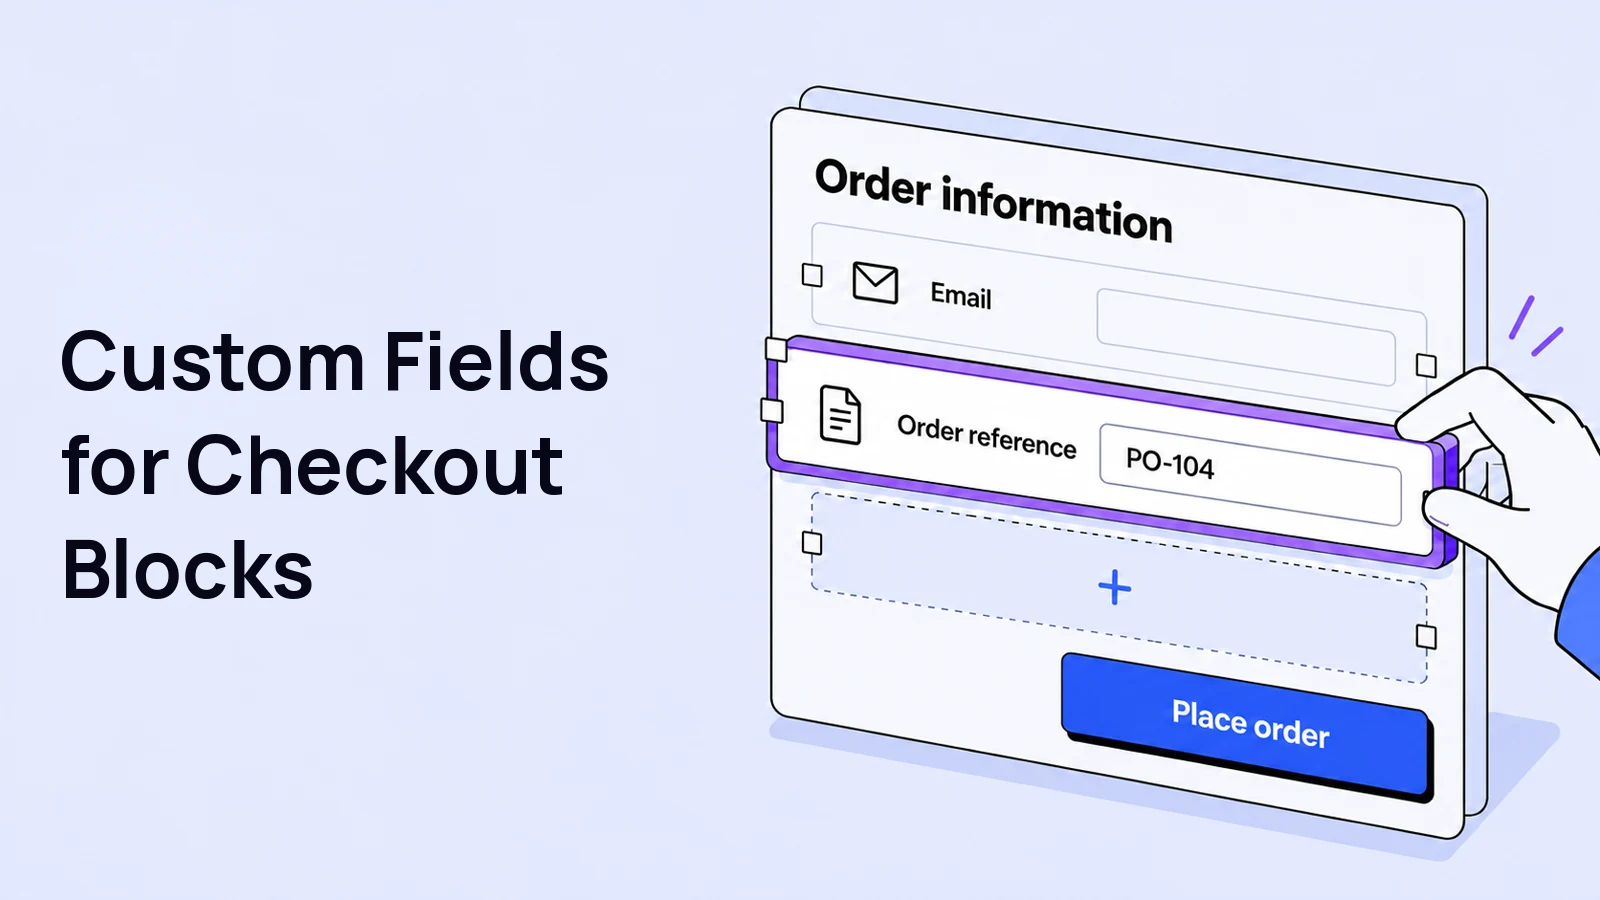
Need a purchase-order reference, a short gift note or another detail attached to a customer’s order? You can add custom order fields to WooCommerce Checkout Blocks with Swift Commerce’s Checkout Field Editor, without putting a code snippet into your theme.
The important part is “Checkout Blocks.” A field added through an old classic-checkout hook will not automatically appear in the block checkout. Swift Commerce uses WooCommerce’s additional-checkout-fields system for the supported fields in this guide.
We will add an optional order-reference field with the Free plugin, check where it appears and place a test order to verify the saved answer. There are also optional Pro examples for a dropdown and checkbox.
In this guide
Check the supported fields before you begin
For this walkthrough, have WooCommerce and Swift Commerce active, a working block-based checkout and a staging site where you can place a test order. Keep WooCommerce current so its additional checkout fields API is available.
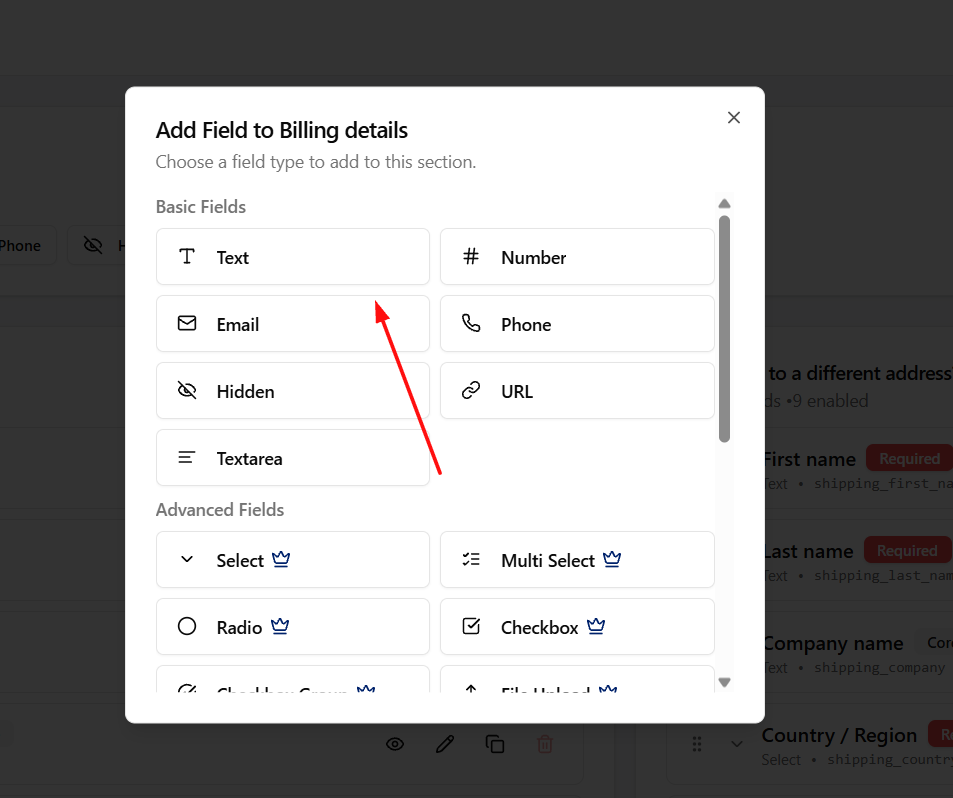
- Free: text-based custom order fields. Swift Commerce maps Text, Number, Email, Phone and URL field types to the Blocks text field, with applicable server-side validation.
- Pro: supported Select and Checkbox fields, in addition to the text-based options.
- Not part of this Blocks integration: file uploads, textarea, hidden fields, date/time fields, content-only elements and fields with conditional logic enabled.
That last point is specific to Swift Commerce’s current Blocks integration. WooCommerce’s own API and classic checkout have different capabilities. Do not assume that every field type visible in a general field picker can be used in the block checkout.
1. Confirm that your checkout uses the Checkout block
- Open WooCommerce → Settings → Advanced and identify the page assigned as your checkout.
- Go to Pages and edit that assigned page.
- Open the editor’s List View and look for the WooCommerce Checkout block.
- If the page instead contains a Shortcode block with
[woocommerce_checkout], it is using classic checkout, not Checkout Blocks.
Do not replace a working checkout on your live store just to follow this tutorial. If you are moving from classic checkout, test your payment methods, shipping methods and other checkout extensions on staging first.
This guide continues with the block-based checkout. The same settings screen also contains classic-checkout controls, which is why checking the page first saves a lot of confusion.
2. Enable Checkout Fields in Swift Commerce
- Open Swift Commerce → Checkout Fields. Use the feature search if you do not immediately see it in the sidebar.
- Make sure the feature’s main toggle is enabled.
- Open the Field Editor tab.
- Locate the Additional information section and make sure the section itself is enabled.
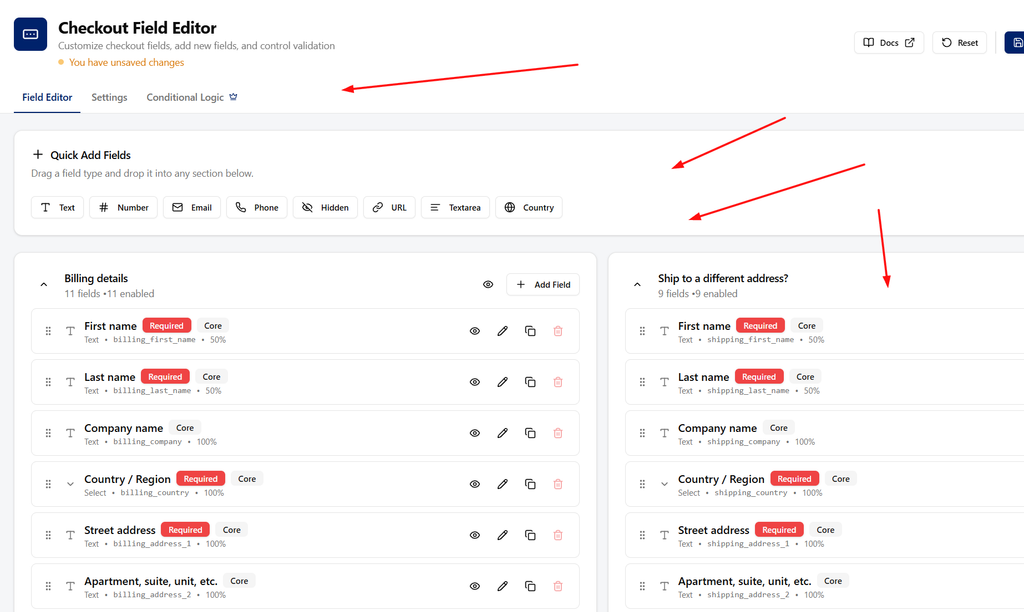
For Blocks, add your new field under Additional information or Order notes in Swift Commerce. Both supported section types are registered in WooCommerce’s Order information location. A custom field placed under Billing details or Shipping is not added to the block checkout by this integration.
3. Add an order-reference text field
- In Additional information, click Add Field.
- Choose Text.
- In the field dialog’s General tab, set Label to Order reference.
- Set Field Key to
order_reference. - Keep Field Enabled switched on.
- In Validation, leave Required Field off for this example. Set Max Length to 40.
- Click Add Field to finish the new field, then click the page-level Save Changes.
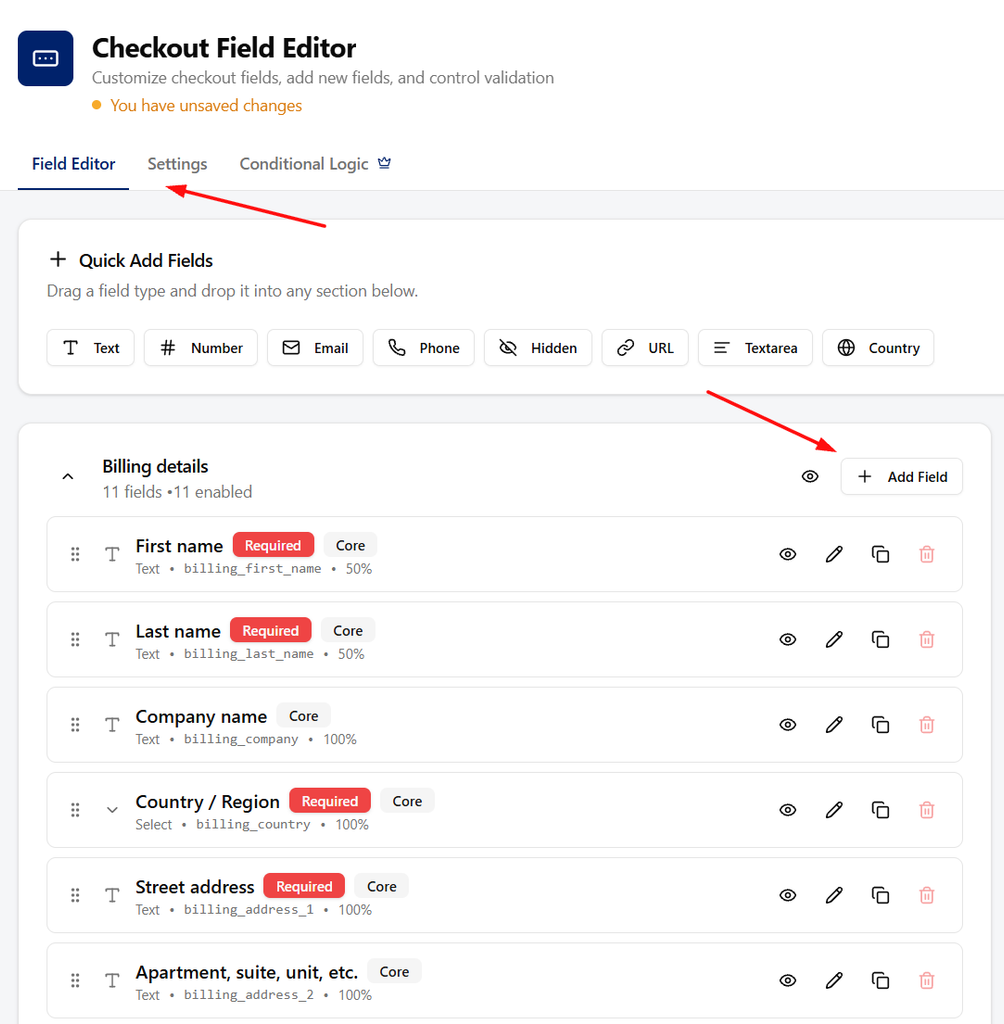
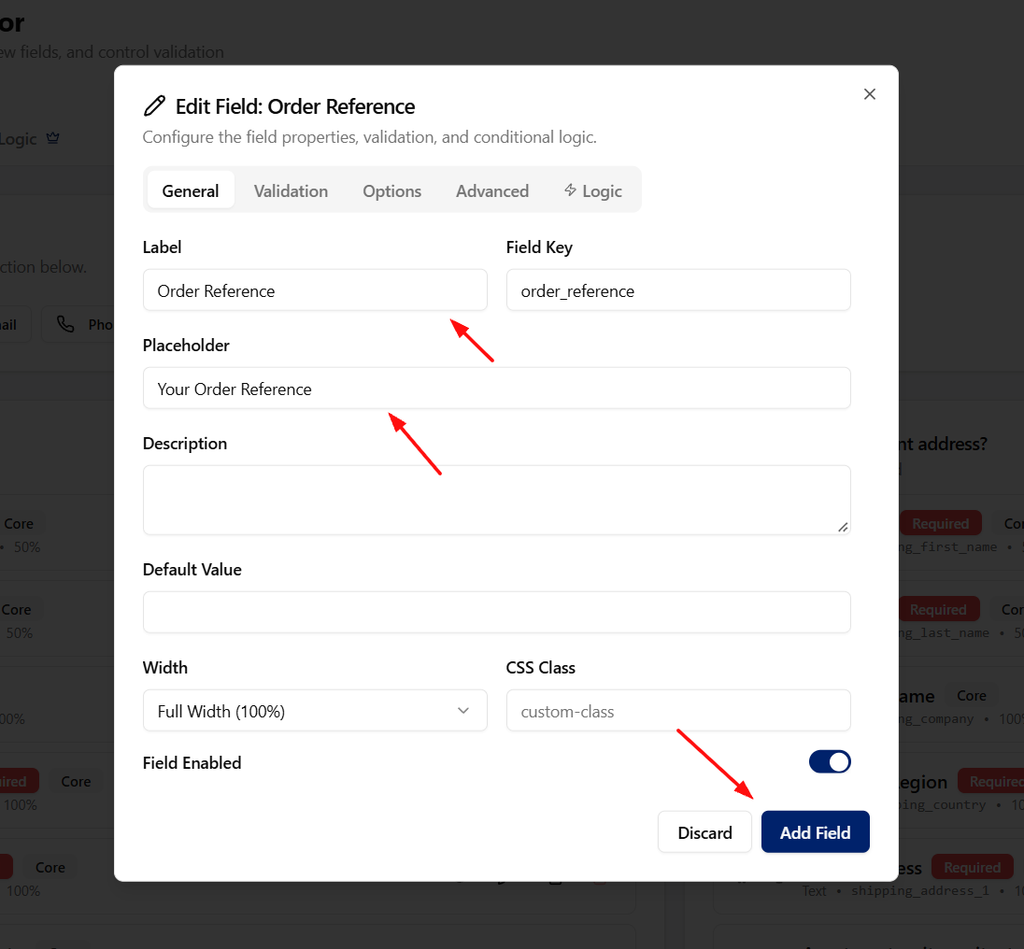
An order reference is useful for customers who want their own internal reference recorded against a purchase. It does not generate a purchase order, approve a credit account or change your payment terms.
Use a stable key that is unique among your fields. Swift Commerce adds its namespace when registering the field with WooCommerce, so enter order_reference in the field editor rather than typing a separate API namespace into the key.
If your field really is essential to fulfilling the order, enable Required Field instead. Avoid making optional business information mandatory for every customer.
4. Add a dropdown or checkbox if you use Pro
You can stop after the text field. If you need controlled answers, Swift Commerce Pro also supports Select and Checkbox fields in this Blocks workflow.
Example: ask how the customer found your store
- Click Add Field in Additional information and choose Select.
- Use How did you hear about us? as the label and
order_sourceas the field key. - In Options, add values and labels such as
search/ Search engine,social/ Social media andfriend/ A friend. - Keep it optional, leave conditional logic disabled and save both the field and the feature page.
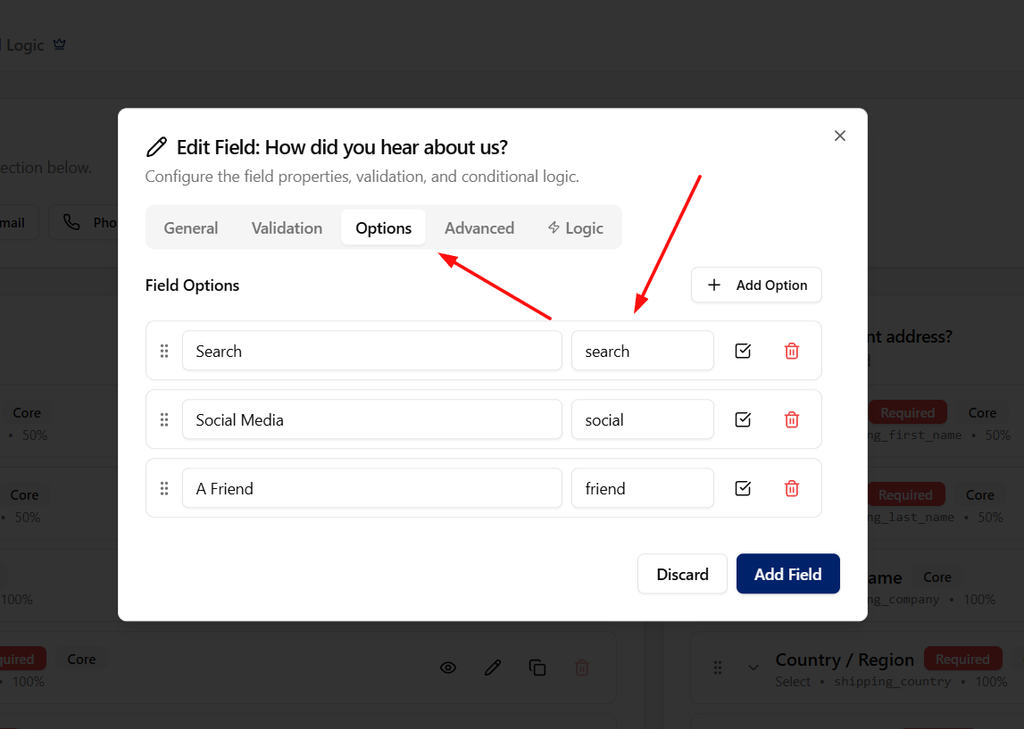
Keep stored option values stable after orders start using them. The readable labels can explain the choices; the values identify the submitted answers.
Example: record a simple packing preference
Add a Checkbox field under the same section, label it Please leave out the printed packing slip and use omit_packing_slip as its key. Keep it optional and save.
This records a preference on the order. It does not automatically change the behavior of a separate packing-slip or fulfillment plugin. Confirm how your team will use the answer before offering the option to customers.
5. Check the Order information block
Return to your checkout page in the WordPress editor. Inside the Checkout block’s structure, find Order information. That is where these fields are rendered, rather than in the billing-address inputs.
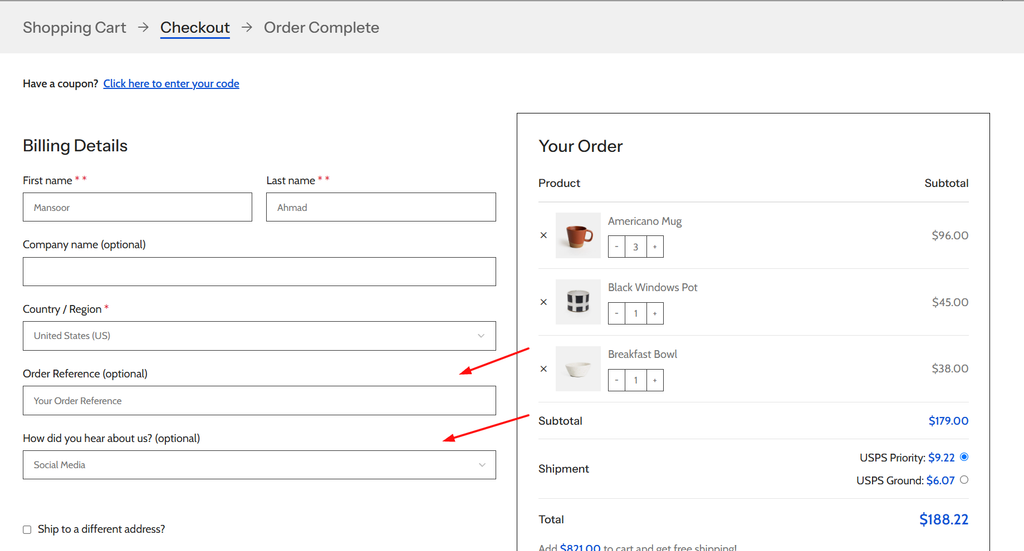
WooCommerce lets you move the Order information block within the supported checkout structure. Its additional checkout fields documentation explains this location and how order-only data is stored.
If a previously customized checkout template is missing Order information, restore that inner block in the Checkout structure before expecting the fields to appear. Save any editor changes, then inspect the actual customer checkout.
The Blocks interface controls the rendered layout. Do not expect Swift Commerce’s classic-checkout width, placeholder or description settings to produce an identical design in Checkout Blocks.
6. Place a test order and check the saved values
- Open the storefront in a private browser window and add a product to the cart.
- Proceed to the assigned checkout page.
- Find Order reference in Order information and enter a recognizable test value, such as
TEST-REF-104. - Try a value longer than the configured maximum and confirm that validation prevents an invalid submission.
- Enter a valid value and complete an order using a test payment method on staging.
- Open the order under WooCommerce → Orders and confirm that the additional order-field value was saved.
- Check the customer’s order details and relevant order email as well, so you know how your current WooCommerce setup presents the data.
Also place a test order with the optional field left empty. If you made a field required, test an empty submission and confirm that it cannot complete.
These are order-specific answers. They are not a new saved billing-address field, and you should not expect a previous order reference to become a permanent customer-profile value.
If your field does not appear
- Confirm that you are testing the assigned Checkout page, not another page with a similar name.
- Check that the Checkout Fields feature, the field and its section are all enabled and saved.
- Use Additional information or Order notes for the custom field, not Billing details or Shipping.
- Use a supported type. Textarea is not the same as Text in this integration.
- Leave the field’s conditional logic disabled. Fields with conditional logic enabled are excluded from this Blocks registration.
- For Select or Checkbox, confirm that Swift Commerce Pro is active and that the dropdown has valid options.
- Check for the Order information inner block and clear any page cache after saving changes.
Do not keep adding duplicate copies of the field to make it appear. Work through the location and support checks first. If it remains missing, share the field type, section, WooCommerce version and checkout type with support.
Questions about custom order fields in Checkout Blocks
Can I use this to remove or reorder core billing fields?
Not through this additional-order-field workflow. Editing core address fields and adding order-specific fields are separate tasks. Classic-checkout field settings should not be treated as a complete Checkout Blocks editor.
Can I use a date picker or conditional show/hide rule here?
Not with Swift Commerce’s current Blocks integration described above. Advanced options available for classic checkout are not automatically supported in Blocks, even when Pro is installed. Verify the specific feature before building a checkout around it.
Do I have to edit functions.php?
No. Swift Commerce handles field registration for the supported configuration. Avoid adding a second code snippet for the same field, which can introduce duplicate IDs or overlapping behavior.
For the rest of the settings, keep the Checkout Field Editor documentation nearby. Start with one useful field, verify the saved order, and only then add the next one.
For the next setup task, see conditional fields on classic checkout, file uploads on classic checkout.