


A checkout file upload lets customers submit artwork or another required file alongside a WooCommerce order. This guide uses Swift Commerce Pro on classic checkout and tests file types, size limits and the saved order.
Swift Commerce Pro can add a file-upload field to classic WooCommerce checkout and associate the uploaded file with the order. We’ll create an Upload artwork field that accepts JPG, PNG, and PDF files up to 5 MB.
Before adding a checkout file upload
You’ll need WooCommerce, Swift Commerce Free, and Swift Commerce Pro active. Enable Checkout Field Editor in Swift Commerce before adding the field.
File Upload is a Pro field for classic checkout. This guide does not add uploads to WooCommerce Checkout Blocks. Open your checkout page in the WordPress editor to check its type: a classic checkout commonly uses [woocommerce_checkout], while a Checkout block uses the block-based implementation.
If your store uses Checkout Blocks, don’t switch a live checkout merely to follow these steps. Test a classic-checkout setup with your payment, shipping, and other checkout integrations first. Our Checkout Blocks guide covers the supported custom order fields for that checkout type.
1. Add a File Upload field
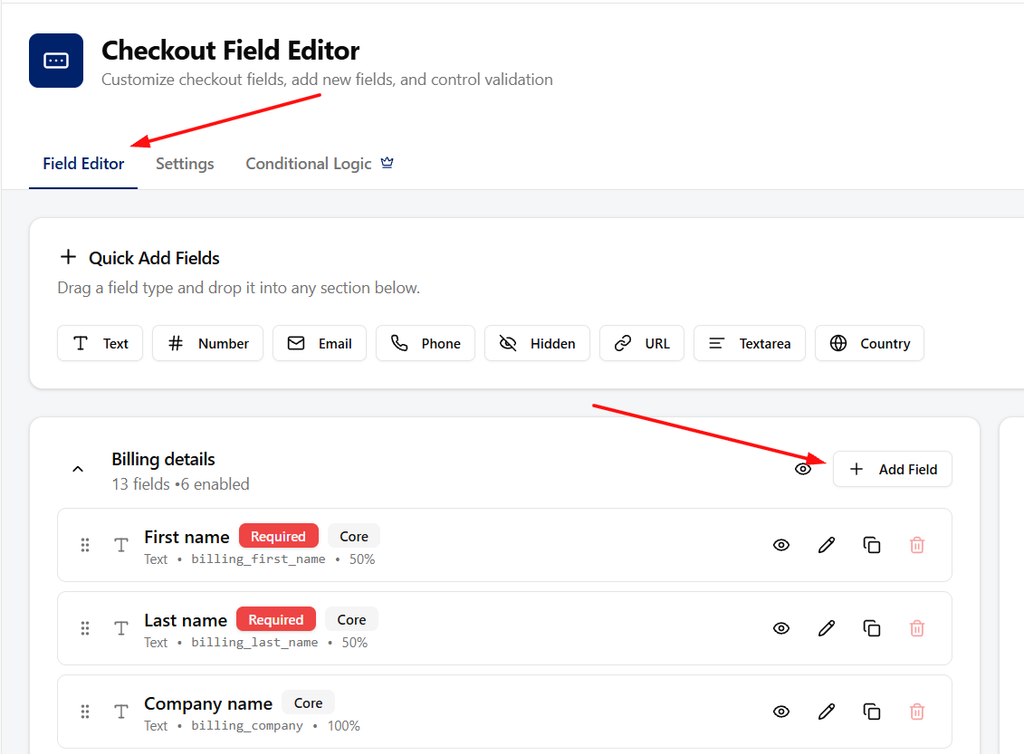
- Open Checkout Field Editor in Swift Commerce.
- Select the Field Editor tab.
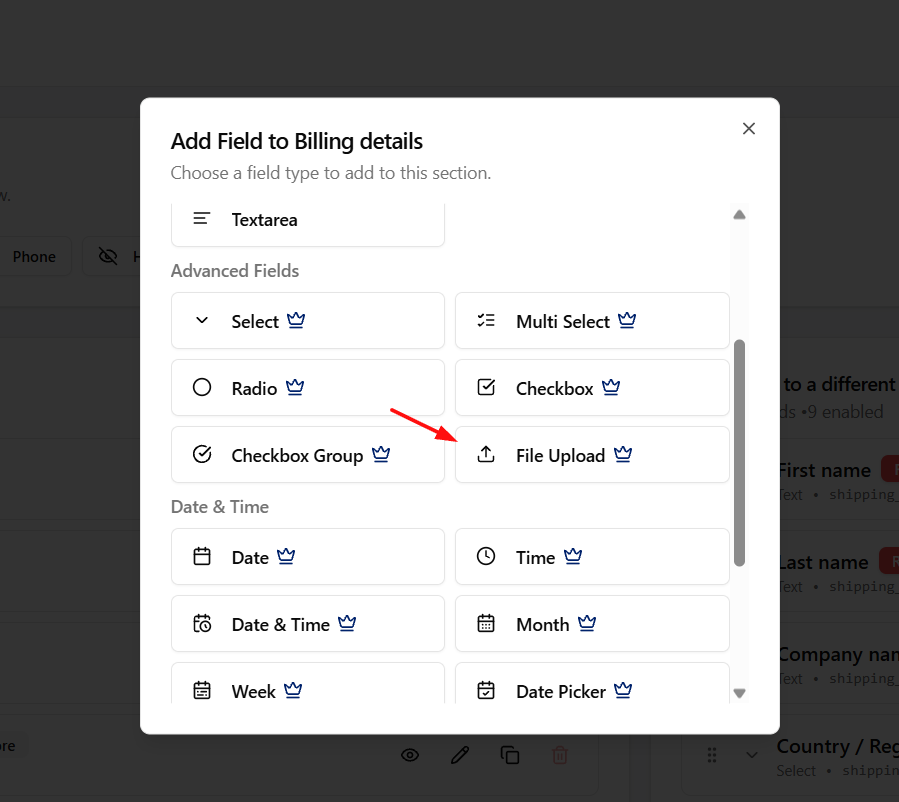
- Click Add Field and choose File Upload.
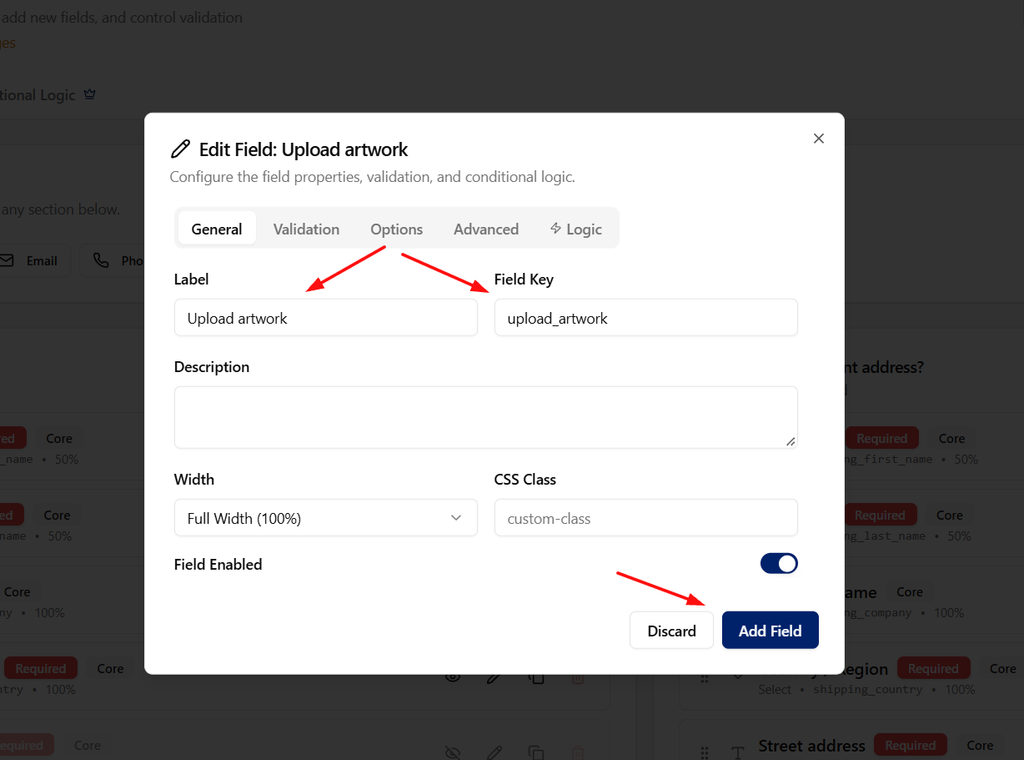
- In General, set Label to Upload artwork.
- Enter a unique lowercase Field Key, such as
additional_artwork_file. - Add a Description that tells the customer what to send, for example: “Upload your print-ready artwork as a JPG, PNG, or PDF. Maximum 5 MB.”
- Keep Field Enabled on.
Use a label that describes the file’s purpose. “Upload artwork” is clearer than “File 1,” especially if you later add a second upload field.
2. Choose the allowed file types
Open the field’s Advanced tab. In Allowed File Types, enter a comma-separated list of extensions:
jpg,jpeg,png,pdf
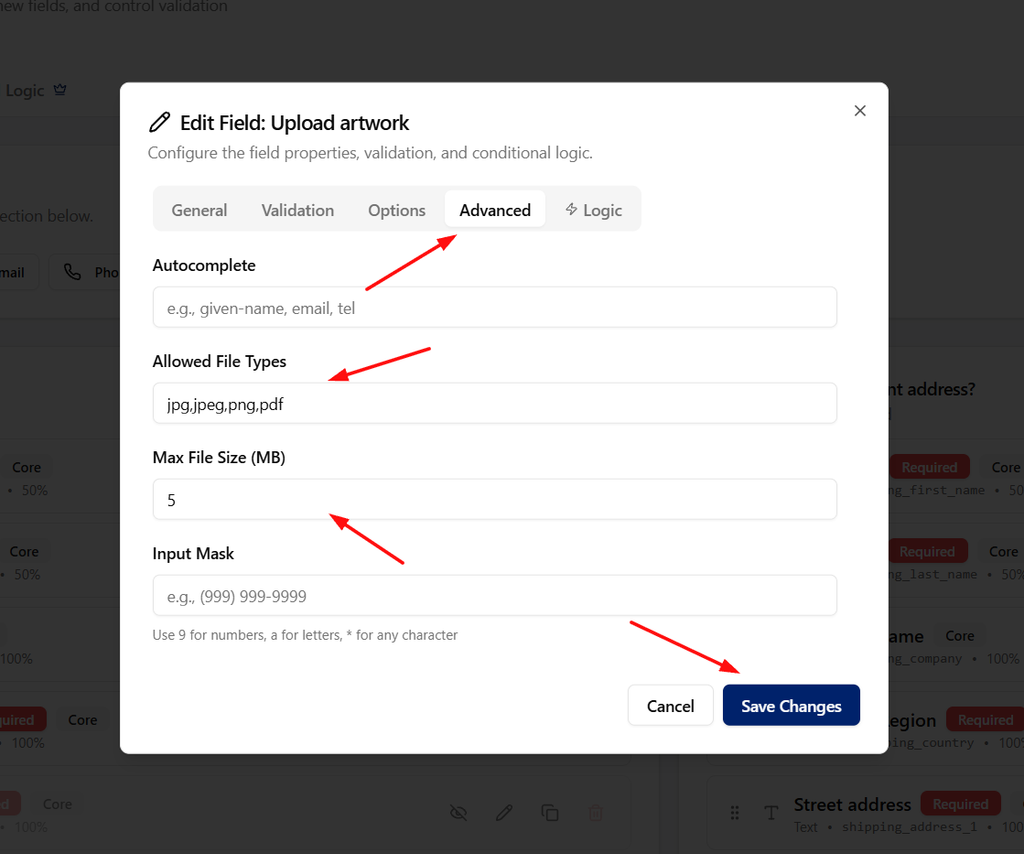
Enter extensions, not a sentence such as “images and documents.” Keep the list limited to the formats your team can actually use. For artwork, an unrestricted upload field creates more work than it solves.
Swift Commerce checks the configured file types and rejects blocked executable formats. Those checks are not antivirus scanning. Your team should still handle customer files carefully and avoid opening unexpected content without appropriate checks.
3. Set the per-file and total size limits
- In the field’s Advanced tab, set Max File Size (MB) to 5.
- Click Add Field, or Save Changes if you’re editing an existing field.
- Open the feature’s Settings tab.
- Expand File Upload Settings.
- Review Max Total Upload Size (MB). For this example, a 10 MB total limit leaves room for two 5 MB uploads if you later add a second file field.
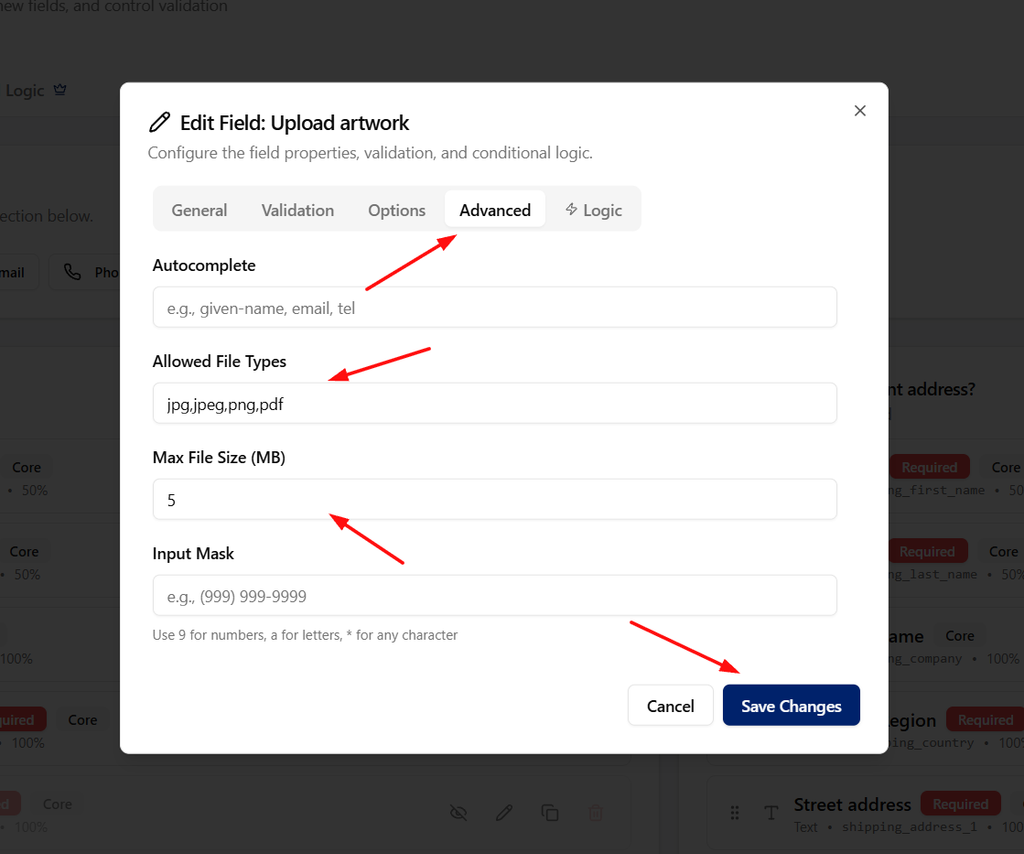
The field limit and total limit do different jobs. A single file must fit its field’s limit, while the combined uploads must fit the checkout’s total limit.
Your hosting server and WordPress configuration can impose lower limits. Raising the Swift Commerce setting doesn’t override a server restriction. If an allowed file fails before reaching the configured limit, ask your host to check the upload and request-size limits.
4. Decide whether an upload is required
Edit the field and open Validation. Turn on Required Field only if an order really cannot proceed without the file.
For a store where every order requires artwork, a required field may be appropriate. On a mixed catalog, requiring artwork for every checkout can stop customers buying ordinary products. Leave it optional unless you’ve designed and tested the right conditional behavior.
To show an upload based on another checkout answer, use the Pro Logic tab. Follow How to Add Conditional Fields to the WooCommerce Checkout Page for the rule setup. Don’t assume a field is product-specific merely because you named it after a product.
5. Save the checkout configuration
Save the field dialog, then click Save Changes in the feature header. Reload the classic checkout with a product in the cart and confirm the label, description, and upload control appear in the intended section.
If the field is missing, check the checkout type first. Then confirm the feature, section, and field are enabled, Pro is active, and the configuration was saved. Also check whether a conditional rule is currently hiding it.
6. Test an actual upload and order
Use harmless sample files and your normal test-payment setup. Check more than the successful path:
- Upload a permitted file smaller than 5 MB and wait for the upload to finish.
- Try an unsupported file type and check that it is rejected.
- Try a file larger than the field limit and check the error.
- If the field is required, try checkout without a file.
- Place a test order with a valid upload.
- Open the order in WooCommerce → Orders and confirm the file field and download link are available.
- Check the customer-facing order details and any order emails where you’ve enabled custom-field display.
An uploaded file is not proof that an order was placed or paid. Complete the test order so you can check that the file is associated with the correct order and available to the people who need it.
How the file is made available
Swift Commerce stores these checkout uploads in protected storage and provides an authorized download route rather than treating them as ordinary public Media Library images.
Download access can be granted to an authorized store manager, the logged-in order owner, or someone with the valid order-key link. Treat those order links as private. Don’t paste them into a public support thread or use them in a screenshot.
The uploaded file is not automatically attached to every email. Where the field is included in order details or emails, review the provided filename or download link instead of expecting an email attachment.
Can a customer upload more than one file?
You can add separate File Upload fields for separate requirements, such as front artwork and back artwork. Give them distinct labels and keys, and check the combined size against Max Total Upload Size (MB).
Should the file be collected on the product page instead?
If the file belongs to an individual product configuration, a Product Addons upload may be a better fit. A checkout upload suits information collected with the order. Choose the point in the purchase flow that matches how your team fulfills the request.
Once the test order works, keep the instructions close to the field: what to upload, which formats you accept, and how large the file can be. The Checkout Field Editor documentation has the full settings reference.
Check the Swift Commerce listing on WordPress.org for Free installation requirements and downloads.
For the next setup task, see Checkout Field Editor capabilities.