


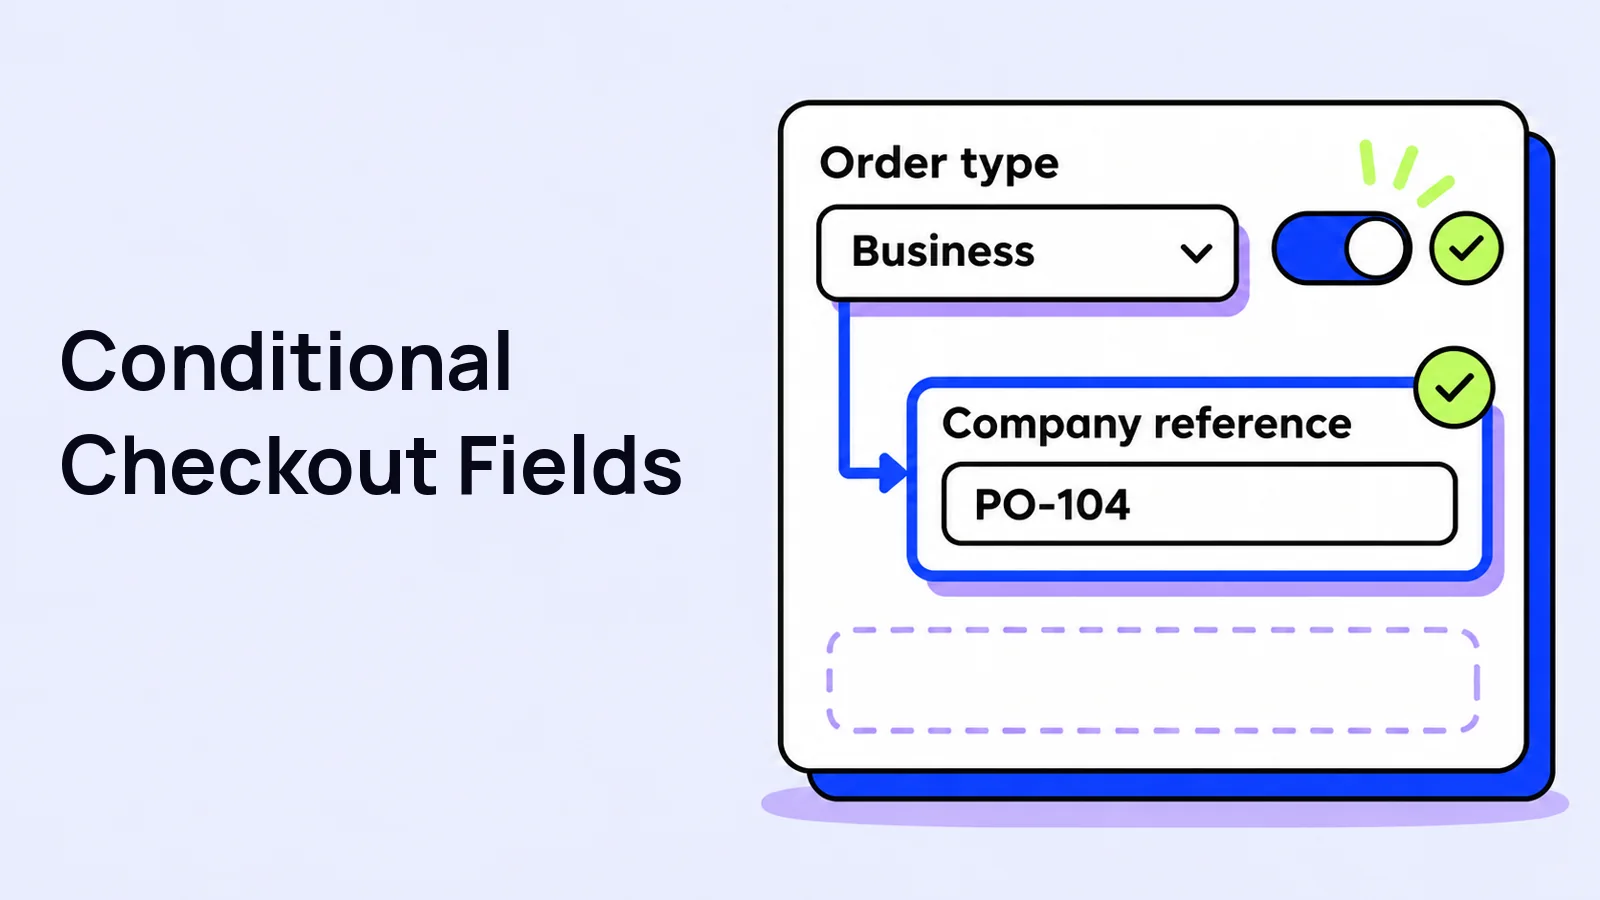
Conditional fields let a WooCommerce checkout ask follow-up questions only when they apply. In this classic-checkout example, Swift Commerce Pro shows a Company reference field when the customer chooses a Business order.
We’ll use Swift Commerce to show a Company reference field only when the customer selects Business as the order type. It’s a small example, but it shows how the trigger field, stored option value, and conditional rule fit together.
Before adding conditional fields to classic checkout
- WooCommerce and Swift Commerce Free are active.
- Swift Commerce Pro is installed and active with access to its premium features.
- Checkout Field Editor is enabled.
- Your checkout uses the classic WooCommerce checkout.
This Swift Commerce conditional-logic setup is for classic checkout, not Checkout Blocks. Check your checkout page in the WordPress editor before starting. A classic checkout commonly uses the [woocommerce_checkout] shortcode; a Checkout block is a different checkout implementation.
If you need fields in Checkout Blocks, use our Checkout Blocks custom order fields guide. Don’t replace a live checkout type without testing the effect on your other checkout integrations.
1. Open the field editor
- In Swift Commerce, open Checkout Field Editor.
- Enable the feature if needed.
- Choose the Field Editor tab.
- Focus on Billing Details, which we’ll use for the two example fields.
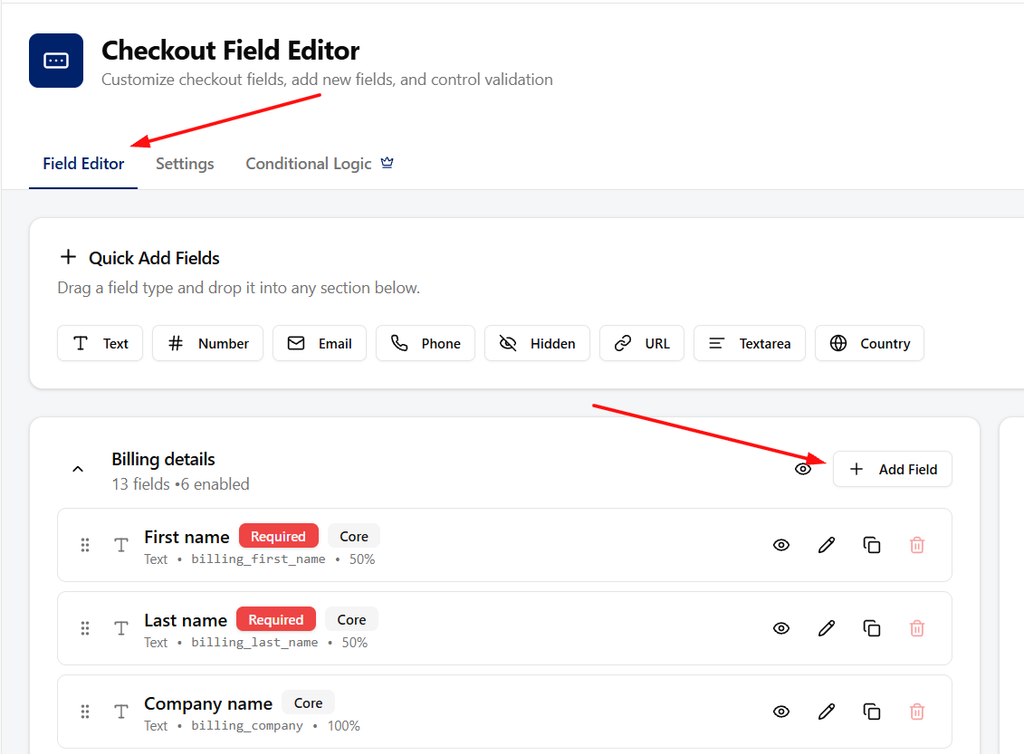
Keep the trigger and its dependent field together so the customer sees the question before the follow-up. Don’t disable core address fields to create space; those fields may be needed for shipping, tax, or payment.
2. Create the Order type dropdown
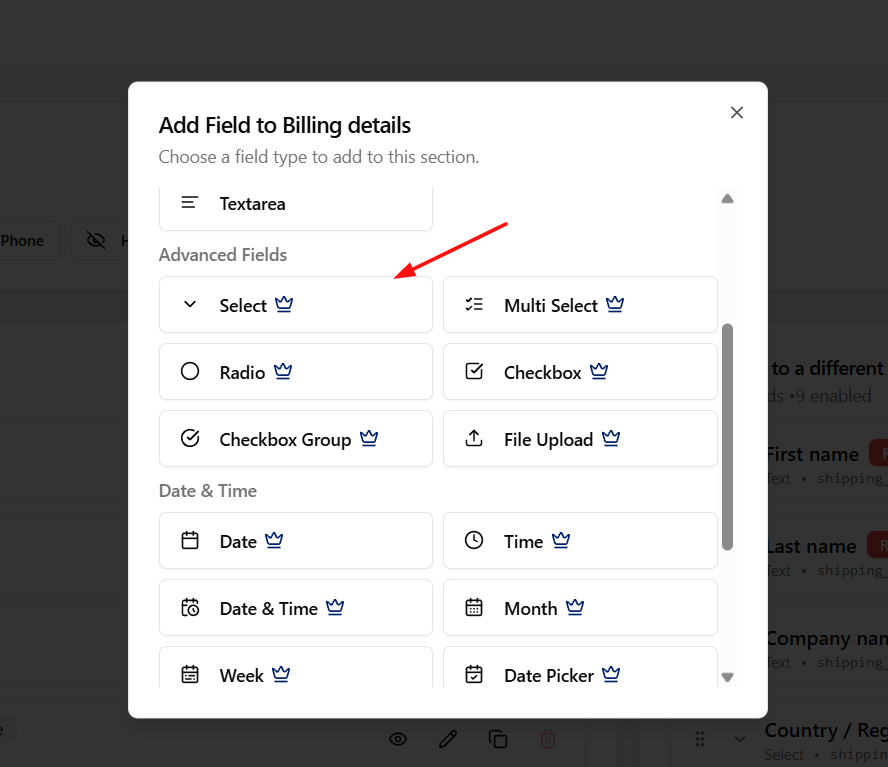
- In the section, click Add Field and choose Select.
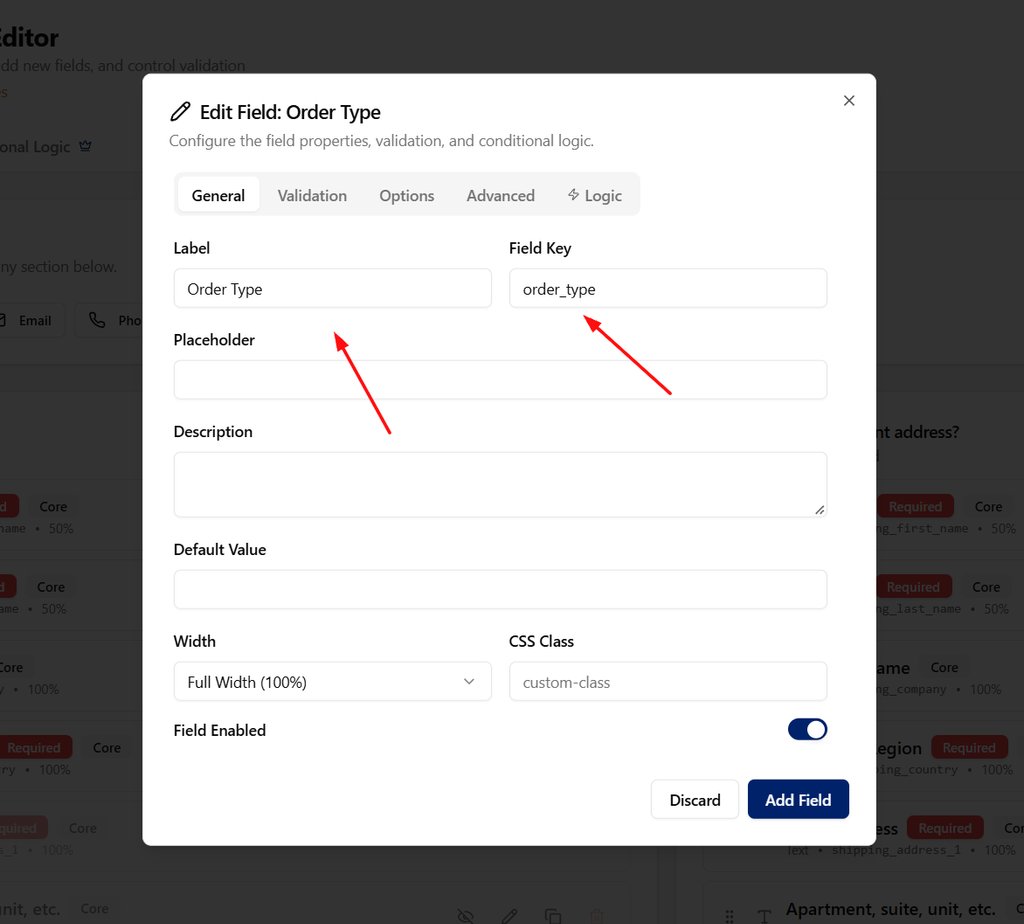
- In General, set Label to Order type.
- Give it a unique lowercase Field Key, such as
additional_order_type. - Open Options and create the two choices below.
- If every customer must choose an order type, enable Required Field in Validation.
- Click Add Field to add the new field to the editor.
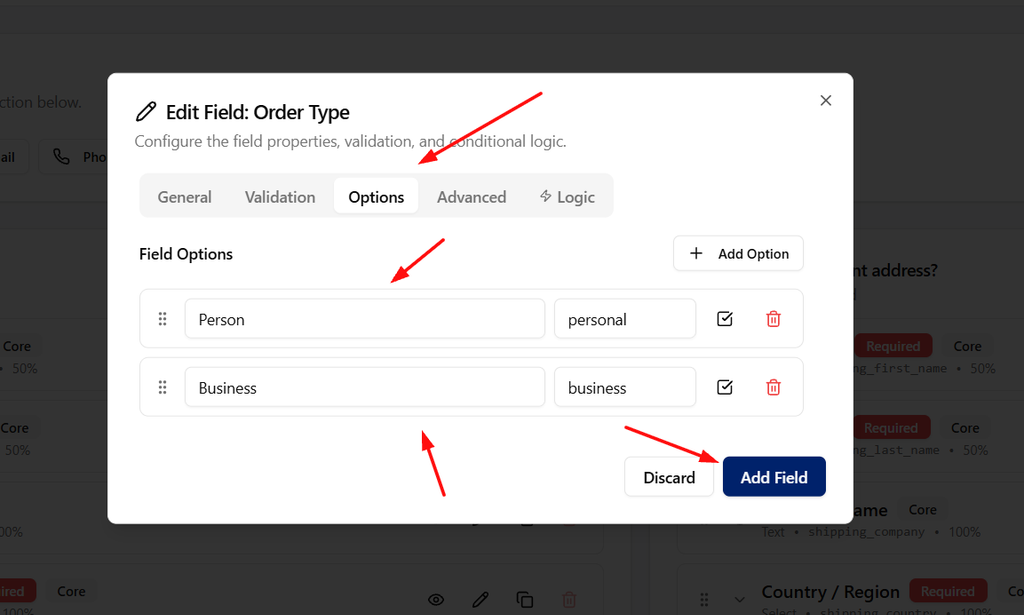
| Label customers see | Value the rule uses |
|---|---|
| Personal | personal |
| Business | business |
The label and value are different things. The customer sees “Business,” but the conditional rule matches the stored value business. Keep those values clear and consistent. Avoid changing a saved field key later without checking the effect on existing configuration.
3. Create the follow-up field
- In the same section, click Add Field and choose Text.
- Set Label to Company reference.
- Set a unique Field Key, such as
additional_company_reference. - Add a description if the buyer needs an example of the reference you accept.
- Keep Field Enabled on.
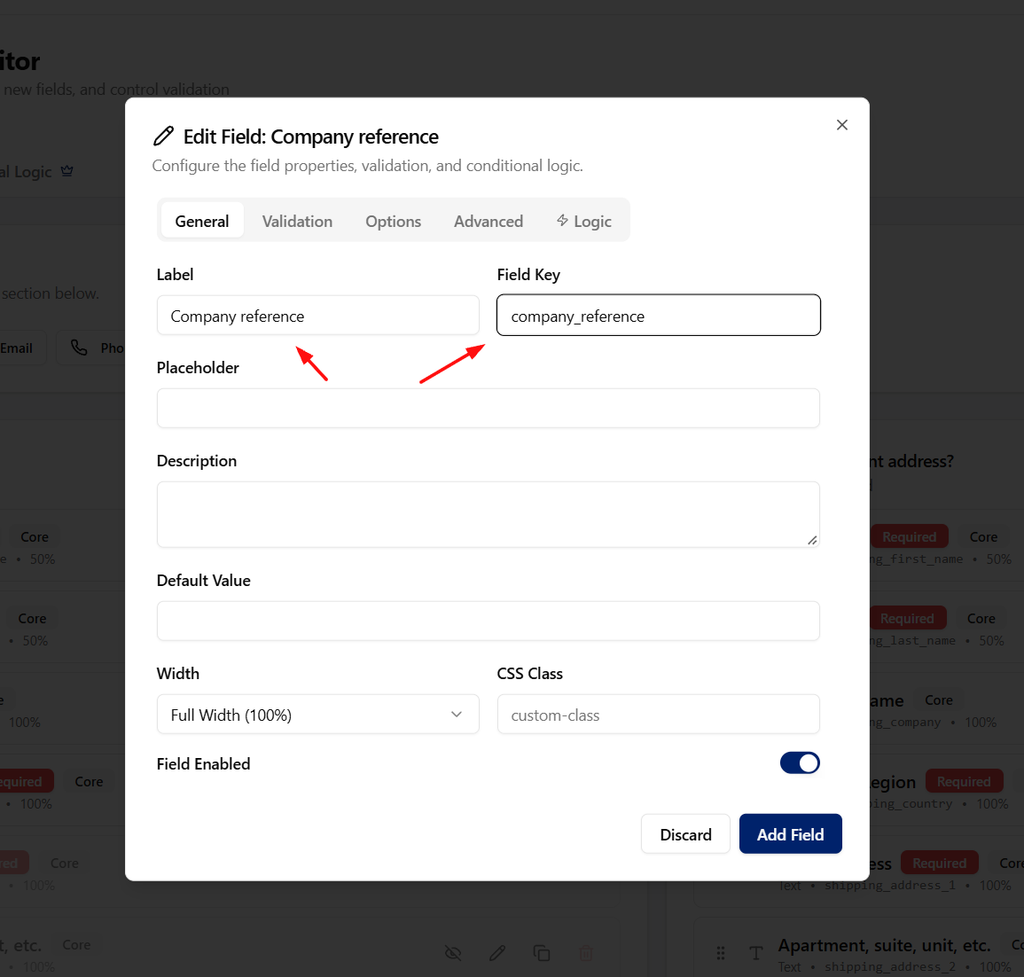
If a reference is optional for business orders, leave it optional in Validation. If it’s genuinely required for those orders, enable Required Field and test validation with the conditional rule in place.
4. Add the conditional rule
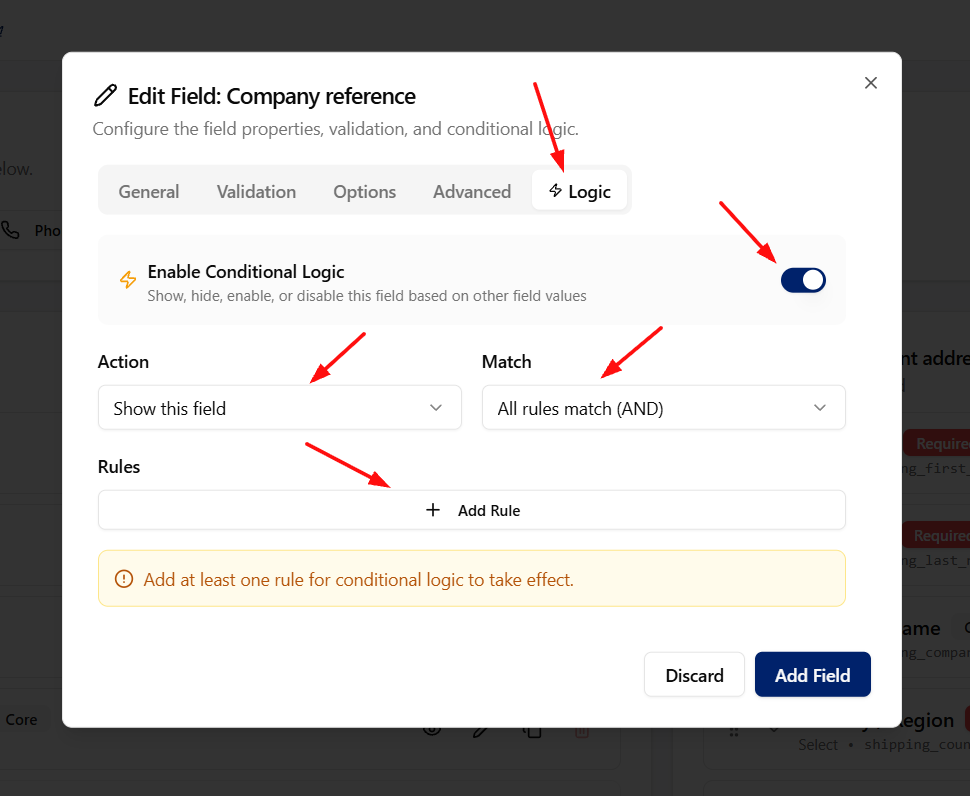
While editing Company reference, open its Logic tab. Configure the rule on the field you want to show or hide, not on the Order type dropdown.
- Turn on Enable Conditional Logic.
- Set Action to Show this field.
- Set Match to All rules match (AND).
- Click Add Rule.
- Choose Order type as the trigger field.
- Choose Equals as the operator.
- Select or enter the Business option’s stored value,
business. - Click Add Field for a new field, or Save Changes when editing an existing one.
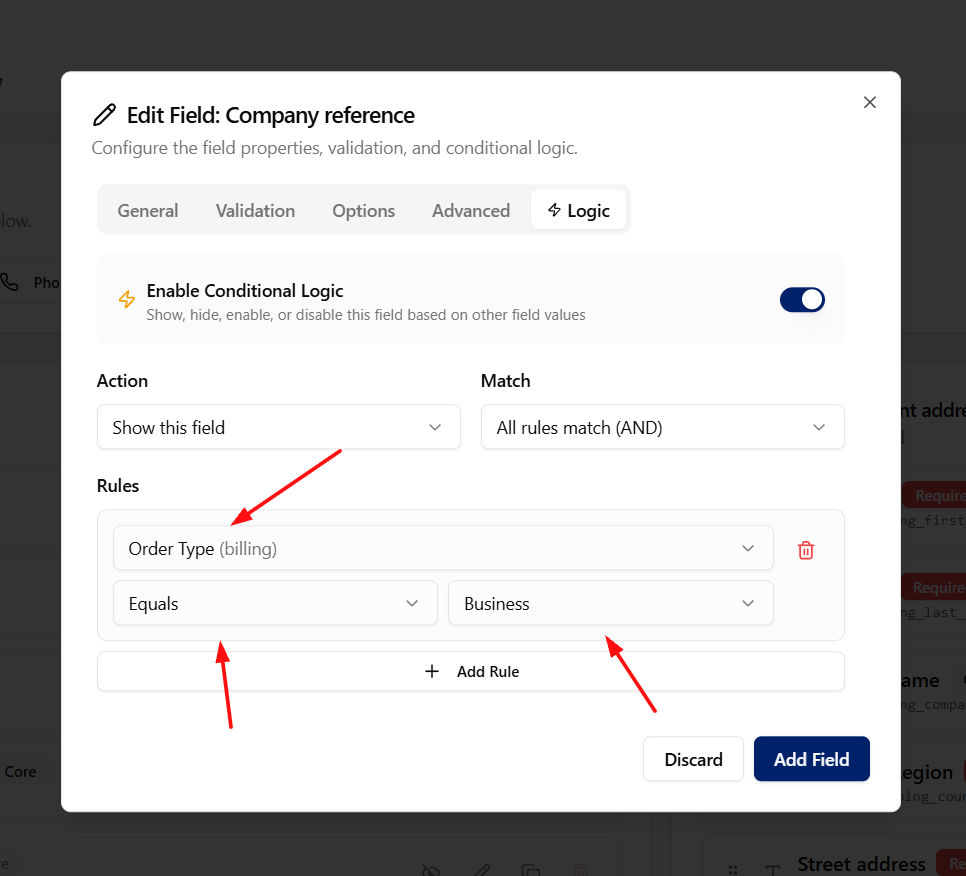
The intended result is: show Company reference when Order type equals business. With Personal selected, the follow-up field should be hidden.
If you can’t select Order type as a trigger, confirm it was added to the editor, is enabled, and isn’t the field you’re currently editing. A field cannot use itself as its own trigger.
5. Save the feature configuration
Arrange the fields so Order type appears before Company reference. Then click Save Changes in the feature header. Saving the dialog adds the field to the editor; saving the feature persists the full configuration.
The main Conditional Logic tab provides a place to review fields with rules. You don’t need to create a second copy of the same rule there.
6. Test both sides of the condition
- Add a product to the cart and open classic checkout.
- Choose Personal. Confirm Company reference is hidden.
- Choose Business. Confirm Company reference appears.
- If you made the reference required, try submitting the business order without it and check the validation message.
- Switch back to Personal and confirm the hidden follow-up doesn’t block that checkout.
- Place a test business order with a reference and check the saved value in WooCommerce’s order details.
Repeat the interaction after a checkout update, such as changing an address or shipping choice. Also check on a phone. Dynamic checkout updates shouldn’t leave you with a field that only worked on the first page load.
How AND and OR change the result
For one rule, AND and OR have the same practical result. They matter when you add more conditions:
- All rules match (AND): every condition must be true before the action applies.
- Any rule matches (OR): one matching condition is enough.
Start with a single rule and verify it before adding more. If a field shows unexpectedly, check the action, the trigger’s stored value, and whether you chose OR when you meant AND.
Can I use a checkbox as the trigger?
Yes. Choose the checkbox field and use an operator suited to it, such as Is checked or Is unchecked. Don’t treat a checkbox like a text field and guess the value it submits.
Can the dependent field be a file upload?
Yes, on classic checkout with Pro. You still need to configure the upload field’s allowed types and size limits. Our classic checkout file-upload guide walks through that setup.
For the complete field types and settings, see the Checkout Field Editor documentation.
Check the Swift Commerce listing on WordPress.org for Free installation requirements and downloads.
For the next setup task, see Checkout Field Editor capabilities.