


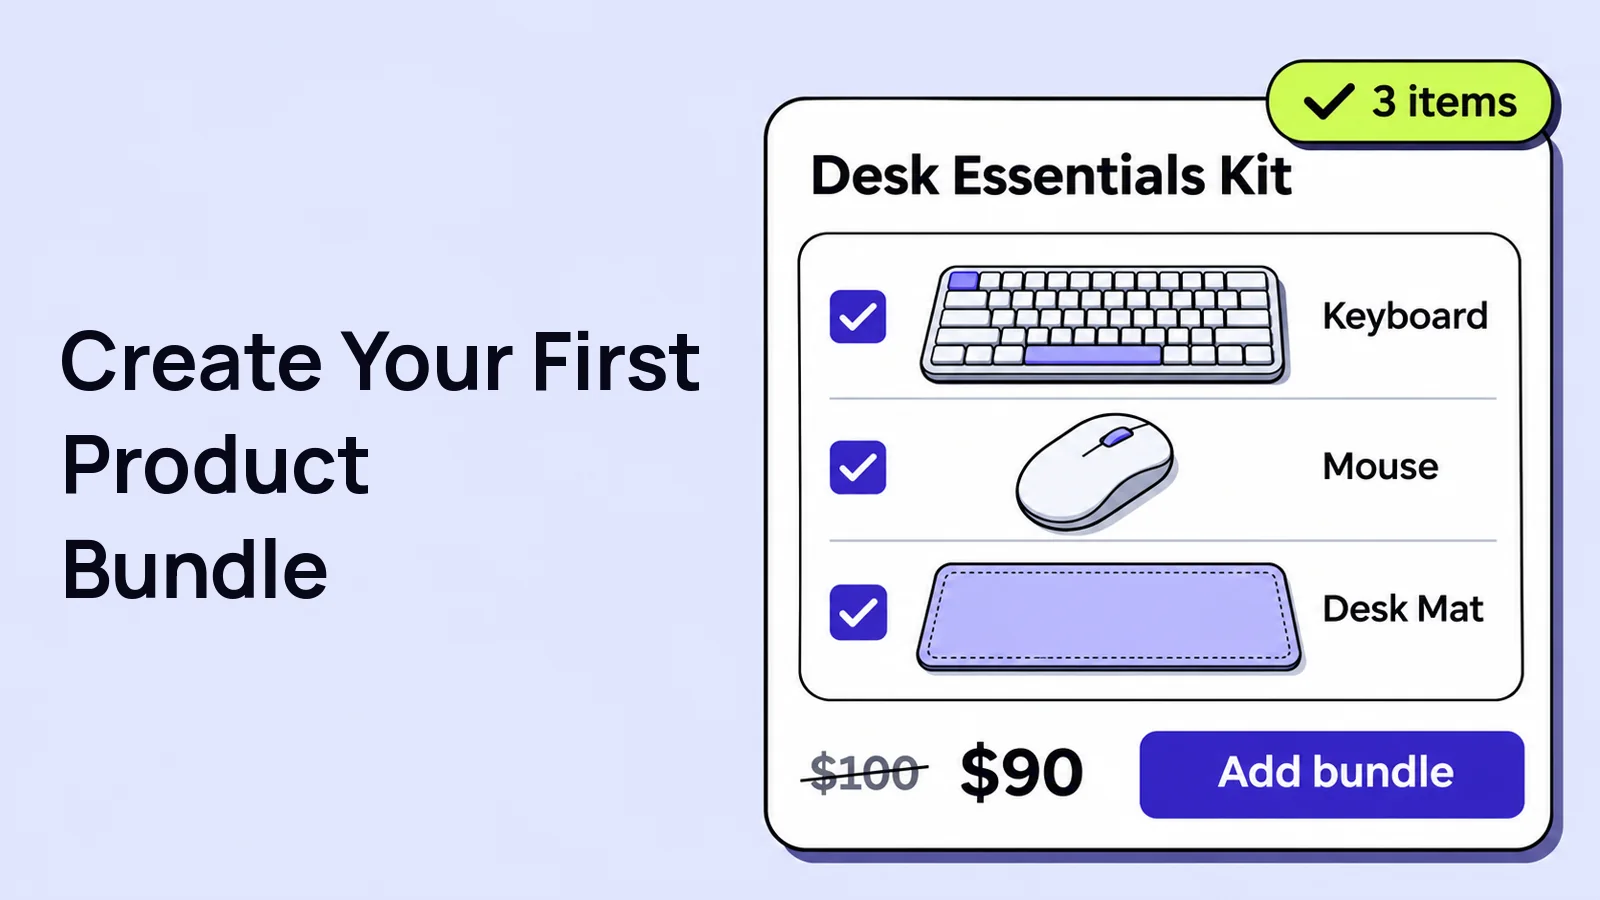
A WooCommerce product bundle lets customers buy related items as one offer. This guide uses Swift Commerce to create a first bundle, configure the included products and test the pricing and order details.
In this guide, we will create a Desk Essentials Kit using Swift Commerce Product Bundles. We will add three existing WooCommerce products, set a bundle price and check the purchase flow. The basic setup uses Swift Commerce Free. You do not need Pro to follow it.
Before creating a WooCommerce product bundle
- Install and activate WooCommerce and Swift Commerce. To install Swift Commerce, go to Plugins → Add New Plugin, search for Swift Commerce, install it and click Activate.
- Create the individual products first. Give each a price, image and correct stock status.
- Use the WooCommerce product editor that contains the Product data panel.
- Keep the new bundle as a draft while you configure it. Use a staging site and a test payment method for the purchase check.
Our example uses a keyboard priced at $60, a mouse at $25 and a desk mat at $15. Those are sample prices before any applicable tax or shipping. Together they cost $100; we will offer the complete kit for $90.
1. Enable Product Bundles
- Open Swift Commerce → Products → Product Bundles.
- Turn on the feature using the switch in the header.
- Click Save Changes.
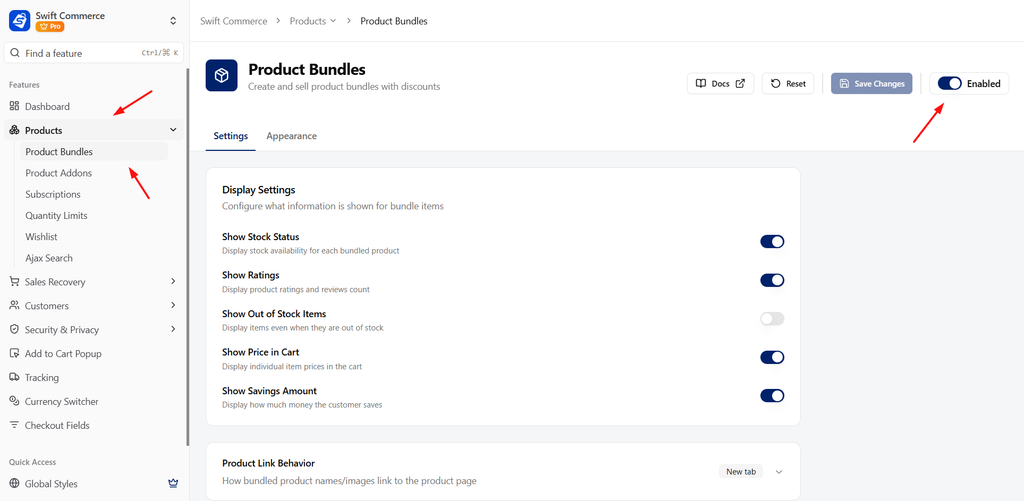
This dashboard controls the shared settings and appearance. You create the actual bundle in the WooCommerce product editor, not on this settings screen. If the feature was already enabled, leave it enabled and continue.
2. Create a product for the bundle
- Go to Products → Add New.
- Enter Desk Essentials Kit as the product name.
- Add a description listing the keyboard, mouse and desk mat, including their quantities.
- Add a product image that shows what customers will receive.
- Scroll to Product data and change the product type from Simple product to Product Bundle.
- Open the Bundle Items tab.
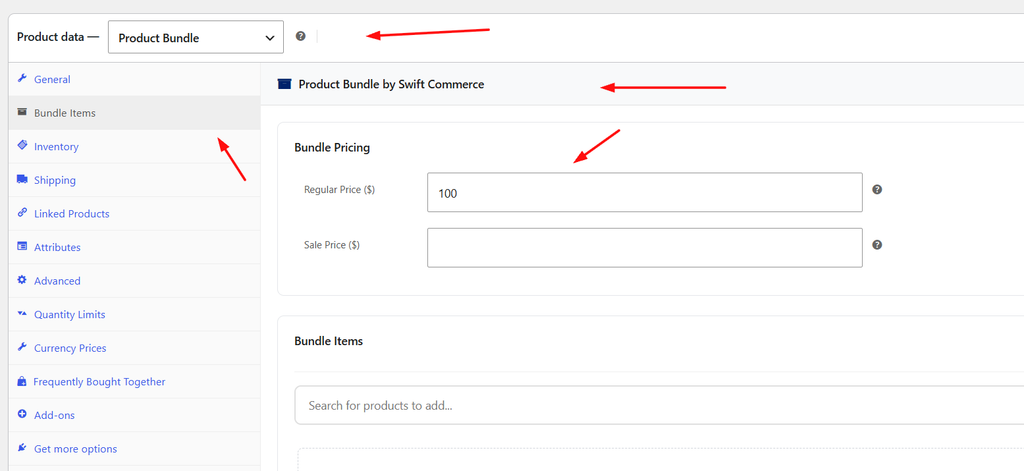
If Product Bundle is missing, check that the feature is enabled and saved, then reload the product editor. Do not create a Grouped product instead; that is a different WooCommerce product type.
3. Add the products and quantities
- In Bundle Items, find the Search for products to add… box.
- Search for the keyboard and select it from the results.
- Repeat for the mouse and desk mat.
- Expand each item if necessary and set its Quantity to 1.
- Leave the item discounts at 0 for this fixed-price example.
- Drag the items into the order you want customers to see.
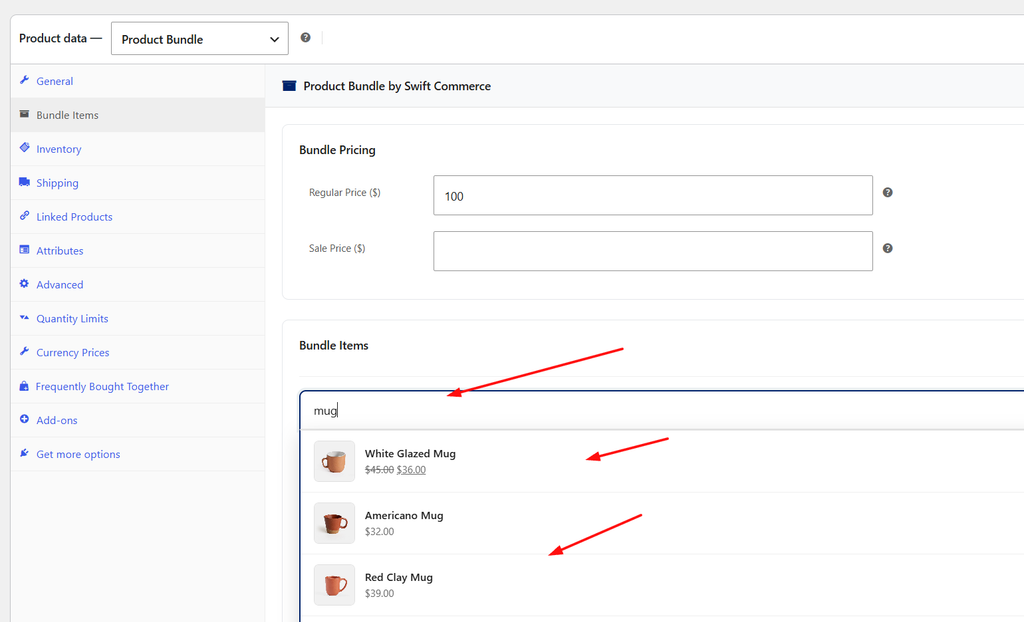
Check the selected products carefully if you have several similarly named items. A bundle should contain the exact products described on its page. Remove a mistaken selection with its trash icon and add the correct product.
Start with simple products for this first bundle. Variable-product selection, optional bundle items and per-item minimum/maximum quantities are Pro capabilities. They are useful for configurable kits, but they are not needed for our three-item offer.
4. Choose fixed or calculated pricing
The Bundle Pricing area contains Regular Price and Sale Price. These fields apply to the whole bundle.
- Enter 100 in Regular Price.
- Enter 90 in Sale Price.
- Save the product as a draft.
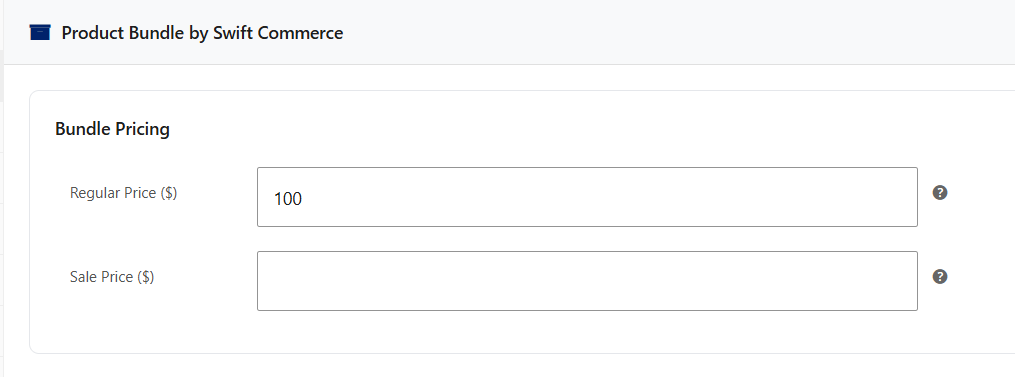
Enter numbers without a currency symbol. The store currency determines the display. Here, the regular bundle price is $100 and the current sale price is $90. Use a regular price that genuinely applies to the offer rather than inventing a higher price just to show a discount.
Alternatively, leave the bundle price fields empty to calculate the price from its items. For example, applying a 10% item discount to each of our three products gives a calculated total of $90. Choose this route if the price should follow the configured component prices and discounts. Do not assume a fixed bundle price will also subtract every item discount again; pick a pricing approach and verify its result.
5. Review display and coupon settings
Return to Swift Commerce → Products → Product Bundles → Settings. Review Show Stock Status, Show Ratings, Show Out of Stock Items and Show Savings Amount. Enable only the information that is useful for your products.
Check Coupon Application too. Decide whether coupons should apply to the bundle or be excluded, then save. If you accept coupons, include one in your test so you know the final discount is what you intended.
In Appearance, choose a design preset and review the sample preview. Some individual design controls require Pro. The preview helps you choose a presentation, but it does not replace checking your real bundle with your theme.
6. Test the real bundle before publishing
Make the draft available to your test user on staging, then check the complete flow:
- The bundle shows the correct three products, quantities and price.
- The add-to-cart action adds the intended bundle, not an unrelated product.
- Changing the number of bundles in the cart gives the expected total. Two kits should contain two of each component.
- Any coupon, shipping charge and tax are calculated as expected.
- The test order lists the bundle and its contents clearly.
- Unavailable components do not create an offer you cannot fulfill.
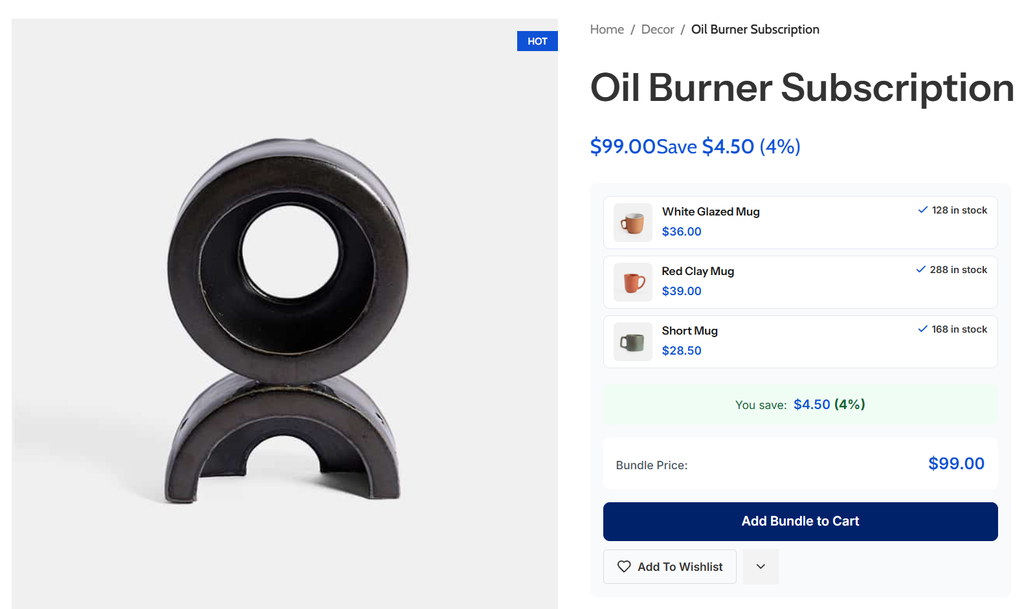
Treat stock as a separate check. Showing a component’s stock status is not the same as synchronizing component inventory. Pro includes Component Inventory Sync; if you use it, test both stock reduction on an order and stock restoration through the relevant cancellation/refund flow.
Once the result is correct, publish the bundle and check its public product URL in a private browser window.
Frequently asked questions
Can I make some bundle items optional?
Yes, with Pro. Enable Optional Bundle Items in the feature’s Advanced Settings and configure the items on the bundle product. Our first-bundle example keeps all three items included.
Is this the same as adding a paid product extra?
No. A bundle combines products from your catalog. An extra can be a warranty, installation service or other choice attached to a product. Use our warranties and services guide for that setup.
Where do I change the bundle’s products later?
Edit the bundle under Products, open Product data → Bundle Items, make the changes and click Update. Recheck the price and purchase flow after changing the contents.
For optional items, variation selection and the other advanced settings, see the Product Bundles documentation.
Check the Swift Commerce listing on WordPress.org for Free installation requirements and downloads.