


WooCommerce gift wrapping gives customers a clear way to request wrapping before they add a product to the cart. Set up an optional paid checkbox with Swift Commerce and test the price and order details.
In this guide, we’ll add an optional $5 gift-wrapping checkbox with Swift Commerce Product Addons. We’ll also cover the part that matters when someone buys more than one item: whether the charge applies once to the cart line or to every unit.
Before offering WooCommerce gift wrapping
- An active WooCommerce store and Swift Commerce.
- A product you can edit in WooCommerce’s product editor.
- A wrapping price and a clear decision about what the service includes.
The checkbox field and paid option pricing used here are available in Swift Commerce Free. Pro is needed if you want conditional fields, such as a gift message that appears only after gift wrapping is selected.
1. Enable Product Addons
- Open Swift Commerce and choose Product Addons under Products.
- Enable the feature if it isn’t already enabled.
- In Settings, set Addon Position to Before Add to Cart Button if you want customers to choose wrapping immediately before buying.
- Enable Show Prices in Labels so the charge is visible beside the option.
- Click Save Changes.
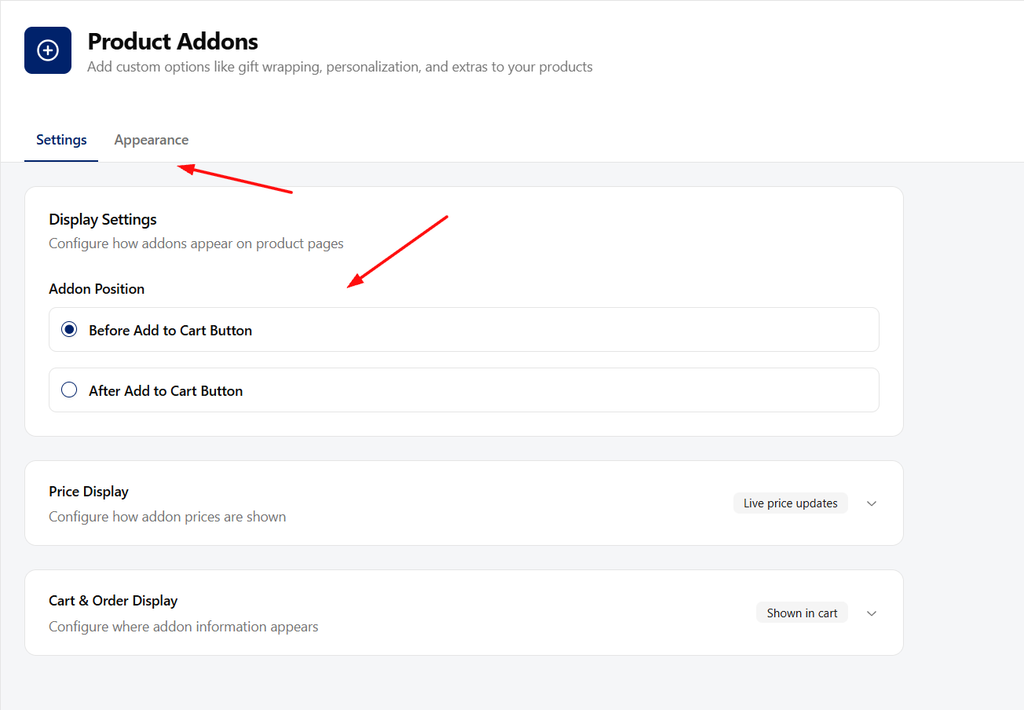
You can also use Live Price Updates to show price changes while customers choose their extras. Keep the service and price understandable even before they reach the cart.
2. Add gift wrapping to a product
- Go to Products → All Products and edit the product you want to offer gift wrapping for.
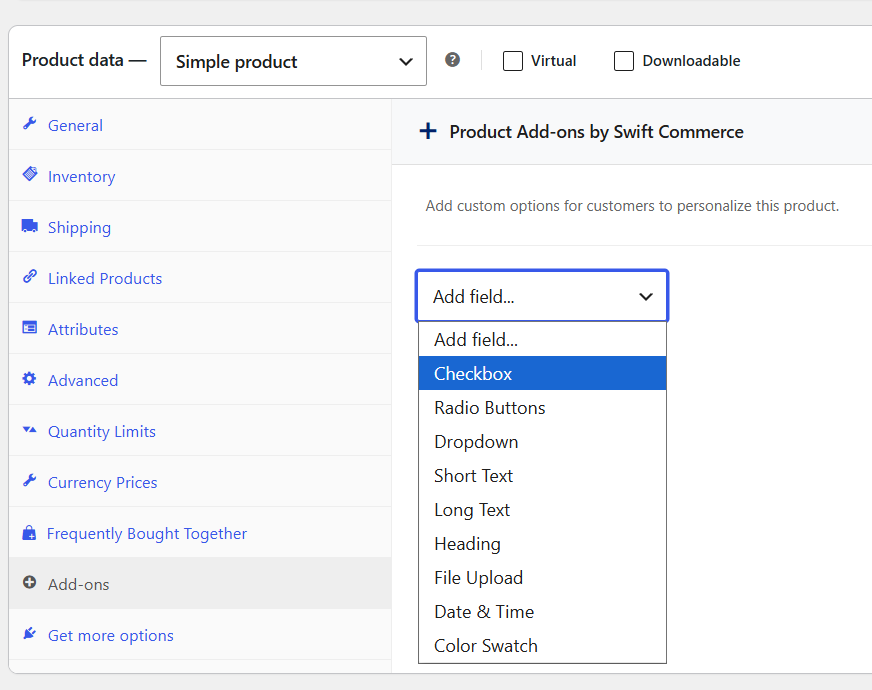
- In the Product data panel, open Add-ons.
- Under Product Add-ons by Swift Commerce, use Add field… and choose Checkbox.
- Set Title to Gift wrapping.
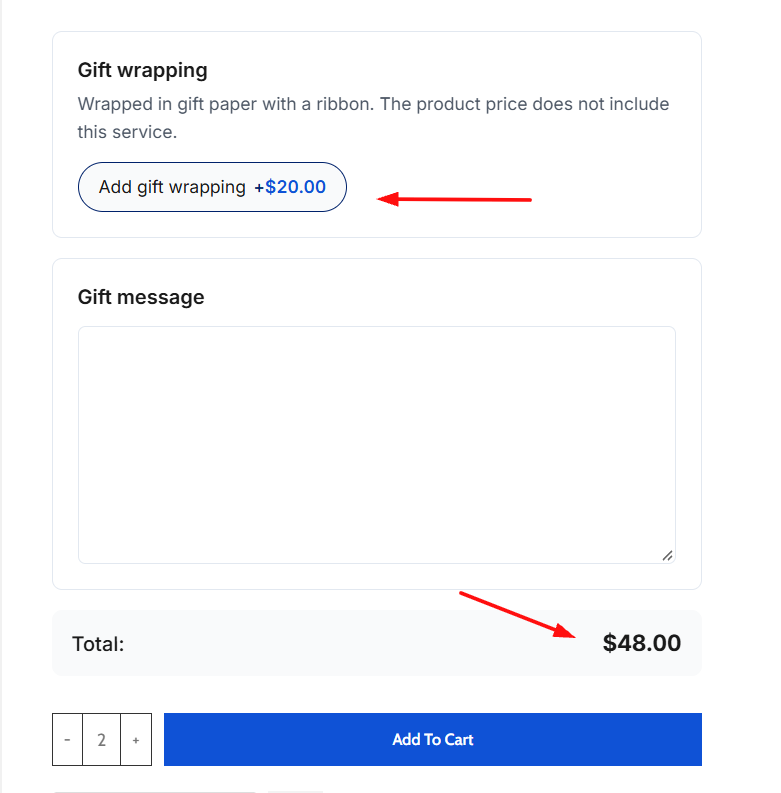
- Add a short Description, such as: “Wrapped in gift paper with a ribbon. The product price does not include this service.”
- Leave Required field unchecked.
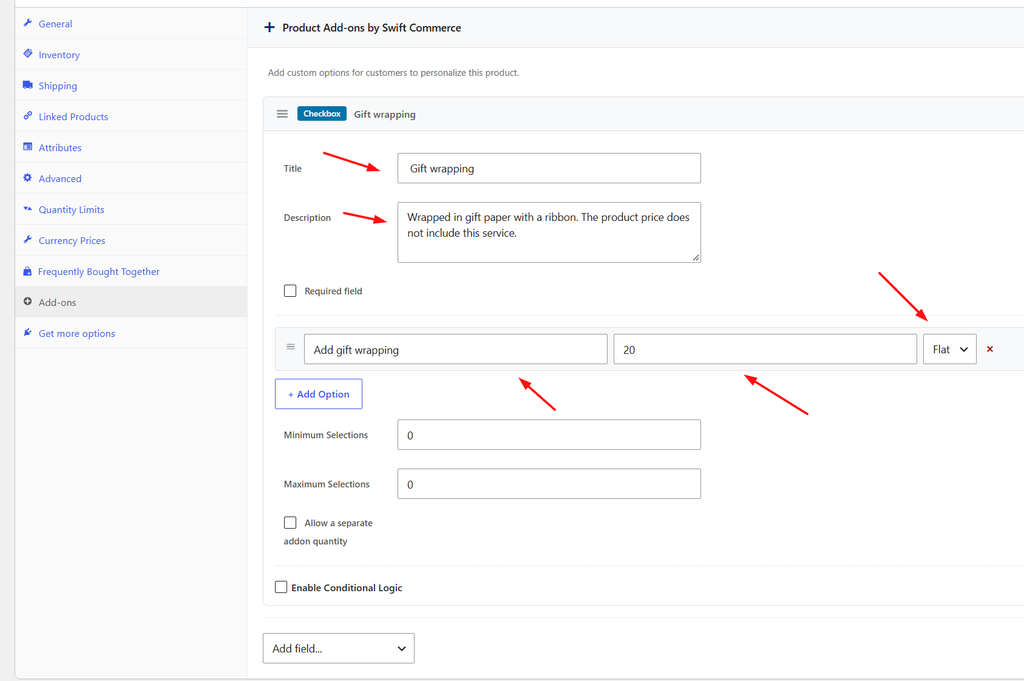
An optional checkbox lets the shopper decline the extra. Making it required would force them to purchase the wrapping, which isn’t what we’re setting up here.
3. Set the wrapping price
In the checkbox field’s Options, add or edit an option. Set its Label to Add gift wrapping and its Price to 5. Enter the number without a currency symbol.
The pricing selector determines what that 5 means. For gift wrapping, the two useful choices are:
| Pricing choice | What happens | Two units of the same configured product |
|---|---|---|
| Qty | Charges the option amount for each product unit. | $10 extra at $5 per unit. |
| Flat | Charges the option amount once for that configured cart line. | $5 extra for the line. |
Use Qty if each unit needs its own wrapping. Use Flat only if you’re happy to provide the service once for that line. Flat does not mean one fee for the entire order. If the customer adds a different product with gift wrapping, that product’s configured line can have its own charge.
Click Update to save the product, or publish it when the product itself is ready. These are per-product add-ons, so repeat the setup on the other products that can be gift wrapped.
4. Add a gift message if you need one
In the same Add-ons panel, add a Short Text or Long Text field. Use a title such as Gift message, leave it optional, and keep its price at 0 if the message is included.
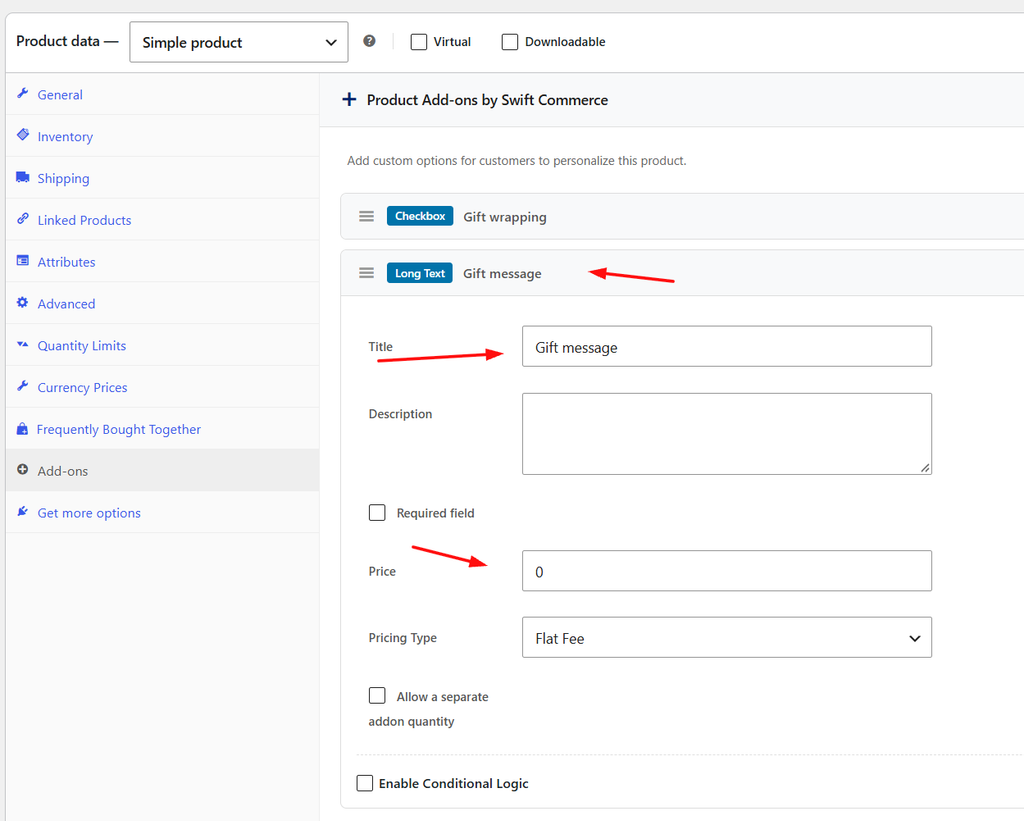
With Free, that message field can remain visible on the product page. If you want it to appear only when the wrapping checkbox is selected, use Product Addons Pro conditional visibility. Don’t mark the message as required unless a message is genuinely necessary to complete the service.
5. Make the selection visible to your team
Return to the Product Addons settings and review Show in Cart, Show in Checkout, and Include in Order Emails. Enable the places where the selected add-on should be shown, then save.
A paid checkbox isn’t much use if the person packing the order never sees it. Check a test order in WooCommerce and confirm that both the gift-wrapping selection and any message are available to the team fulfilling it.
6. Test the price before offering it to customers
- Open the product page with gift wrapping unselected. Add the product and check the normal price.
- Select wrapping and confirm the extra charge is visible.
- Buy a quantity of 2 and check that the fee follows your Qty or Flat choice.
- Add a second product or a differently configured line and check the charges again.
- Place a test order using your normal tax and shipping configuration. Check the order details and email.
If the option doesn’t appear, confirm Product Addons is enabled, the product was updated, and you’re looking at the correct product rather than a cached page. If the amount looks wrong, check the pricing type before changing the price itself.
Common questions
Does gift wrapping need its own WooCommerce product?
Not for this setup. It is a paid extra attached to the purchased product. It isn’t a separate stock-managed wrapping product, and selecting it doesn’t automatically deduct wrapping-paper inventory.
Can I offer different wrapping choices?
Yes. A radio or dropdown field is a better fit when the customer must choose one wrapping style from several options. Give each option a clear label and its own price. Keep the field optional if “no wrapping” should remain possible.
Can this also be used for warranties or other services?
Yes. The same paid-option approach works for services that belong to a product. Our guide to selling warranties and services as WooCommerce product extras covers that setup.
Start with one product and one wrapping option. Once the price and order details look right, roll it out to the rest of your gift-friendly products. For the full field reference, see the Product Addons documentation.