


Google reCAPTCHA v3 checks a form submission in the background and returns a risk score. Swift Commerce compares that score with your chosen threshold. It does not show the v2 “I’m not a robot” checkbox, and it does not guarantee that every abusive request will be blocked.
This guide uses Swift Commerce’s reCAPTCHA feature with Google v3, available in Free. Start on staging, keep an administrator session open and use a second private window for tests. Use an inbox and test account you control. Do not run two CAPTCHA integrations on the same form.
1. Create Google reCAPTCHA v3 keys
Open the Google reCAPTCHA Admin console. Register the hostname where the protected form runs and choose reCAPTCHA v3. Copy the public site key and matching secret key. A v2 key pair cannot be used for v3. Keep the secret out of public screenshots and HTML.
Google’s v3 reference explains scores and thresholds. A score closer to 1 indicates lower assessed risk, not a guarantee of identity. Begin with 0.5 as a test threshold, then review legitimate and unwanted submissions before changing it.
2. Connect the keys in Swift Commerce
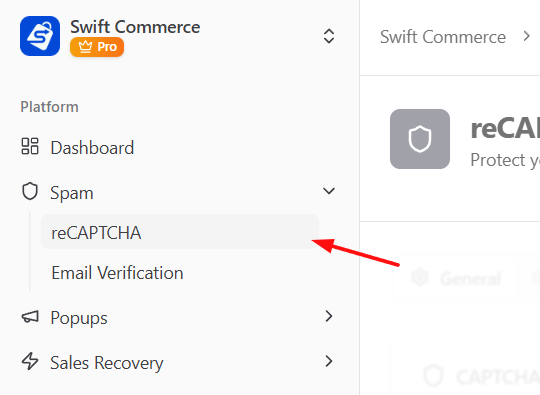
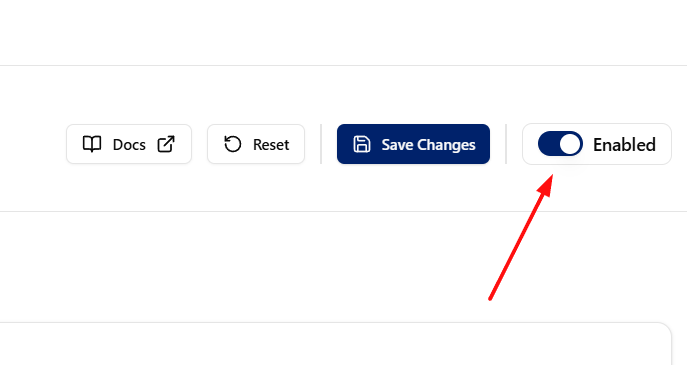
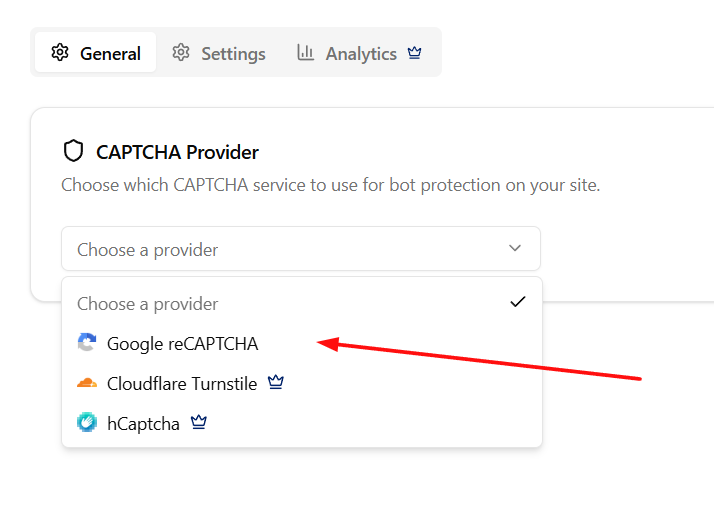
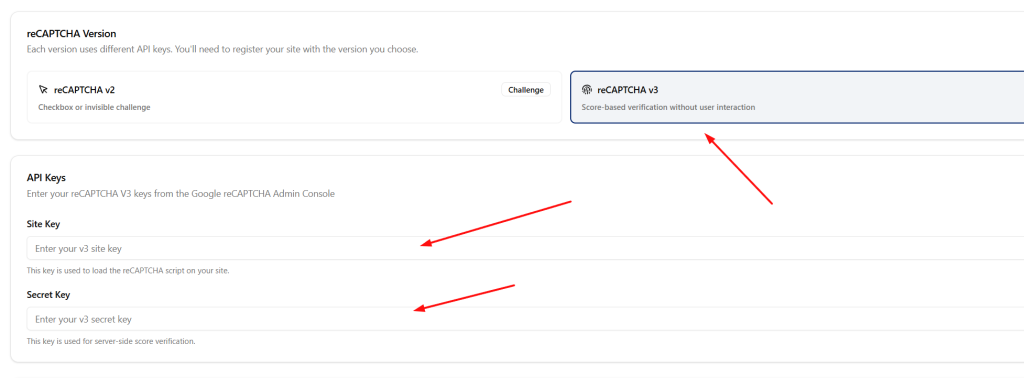
Open Swift Commerce → Security & Privacy → reCAPTCHA → Setup. Select Google reCAPTCHA, then reCAPTCHA v3. Enter the matching keys and review the score threshold. Enable the feature and save the settings. There is one selected provider for all protected locations, so review existing form selections before changing it.
The following screenshots show an earlier dashboard. The current Setup tab contains provider, version and key settings; the current Protection tab contains the form selections.
3. Select the forms to protect
Open Protection and select the forms you actually use. Free supports WordPress Login, WordPress Registration, Lost Password, WooCommerce Login, WooCommerce Registration, Checkout Page and Comment Forms. Pro adds Add Payment Method and Product Reviews. Save again after selecting the locations.
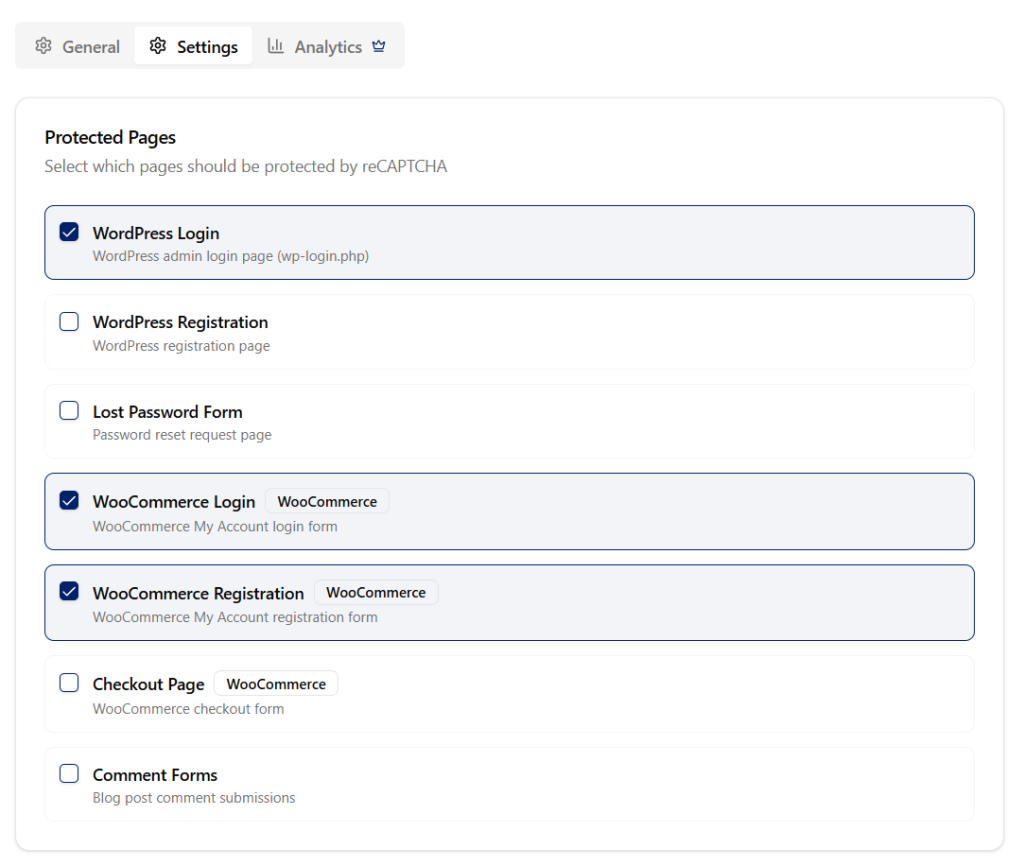
WooCommerce Login and WooCommerce Registration refer to different My Account forms. WordPress Registration is a separate screen. Selecting a form does not enable registration or create a page. Check that the target form is available while signed out. Custom page-builder and membership forms need separate compatibility checks.
4. Test the protected submission
In the private window, open a selected form and complete a normal submission with valid test details. Confirm the expected result: a legitimate login succeeds, a registration creates the intended test account, or a sandbox checkout reaches the correct order result. Repeat for each selected location, including Checkout Blocks if that is what your store uses.
Also test a missing or failed verification response in a controlled staging setup; the protected submission must not succeed with an invalid check. A hidden checkbox alone is not evidence that server-side verification works. Do not change a production secret or lock out your only administrator to create a failure test.
With Pro, check that your test connection is not intentionally exempted by an IP whitelist. Role bypass applies only to a user who is already signed in, not an anonymous visitor trying to log in.
If legitimate submissions are blocked
Confirm that the selected version and keys match, the hostname is allowed and required provider scripts are not blocked by a cache, consent tool or browser extension. Review the threshold rather than repeatedly lowering it without checking results. Pro’s optional Verification analytics can help identify failure patterns, but a passed check is not proof of identity or a purchase.
CAPTCHA does not verify inbox ownership, approve registrations or protect every page from scraping. If new customers must verify an email address or wait for approval, configure Registration & Access separately. Recheck the complete flow whenever your theme, checkout or CAPTCHA provider changes.
For the next setup task, see the Google reCAPTCHA login walkthrough, the reCAPTCHA settings reference.